The Overton Technique

My friend, Roxanne Bouché Overton (roxanne_overton on Instagram) has been developing a collection of techniques she calls Intentional Camera Movement or ICM. Many of her images are just that: moderately long exposures (perhaps 1/10 to 1 second) during which she moves the camera up, down, side-to-side, perhaps in a curved motion, forward/back or zoom in/out. As you can see from her Instagram feed, she’s become quite good at it.

But a few days ago I attended a presentation she gave, and at the end she showed the results of another variation on the technique. Here are two of her images. I think you can see why I was intrigued.

Multiples .003.jpegPhoto by Roxanne Bouché Overton

Multiples .001.jpegPhoto by Roxanne Bouché Overton

Based on what she explained, I decided to give it a try. Here are my first results:

L1000356-Edit.jpg“Cityscape #1” by Doug Kaye

L1000333-Edit.jpg“Walk This Way” by Doug Kaye

L1000375-Edit-3.jpg
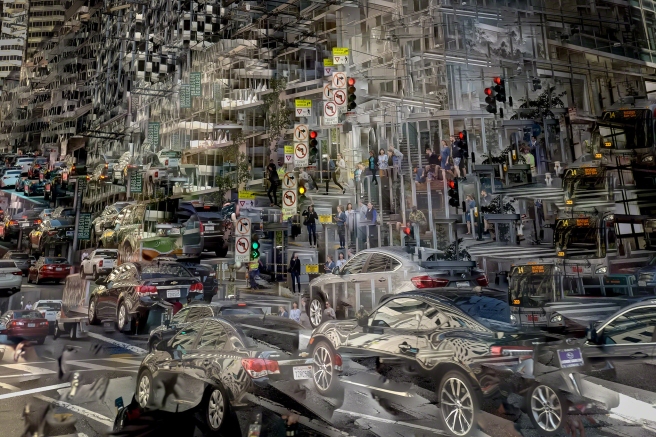
“Cityscape #2” by Doug Kaye

L1000346-Edit.jpg
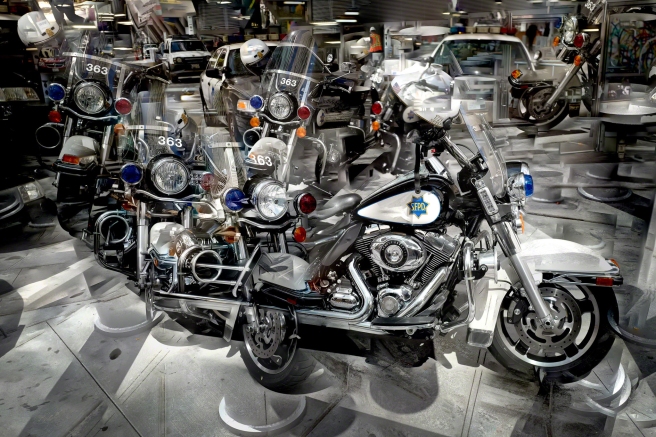
“Bike 363” by Doug Kaye

So, how do you do this? It’s remarkably simple.

First are the exposures. Unlike Roxanne’s other ICM work, these are not long exposures, but rather traditional short-exposure shots. There are multiple handheld images. In the case of “Cityscape #1”, I photographed a street sculpture by walking around it, shooting about 20 images from all 360 degrees. Here are two samples of the individual images:

L1000356.jpg  L1000361.jpg

From Lightroom, I selected all the images, then [Photo…Edit in…Open in Photoshop as Layers]. Once in Photoshop, I selected all the layers, then [Edit…Auto-Blend Layers…]

Screen Shot 2018-08-18 at 10.08.48 PM.png

(Note that sometimes I check Seamless Tones and Colors, but other times it works better without.)

That’s it! Seriously. It’s almost embarrassingly simple. I flatten the image (merge the layers) and save. The resulting image is automatically returned to Lightroom.

What’s going on here? Auto-Blend is typically used for processing focus-stacked images, most often for macro photography. Photoshop creates a layer mask for each image (layer) then analyzes the overall image, one very small region at a time. For each region, it looks at each layer and determines which layer can provide the sharpest sub-image for that region. It then “masks in” that region on that layer. When the layers are merged, you have an image with the maximum sharpness in each region.

But that’s for focus stacking. In this technique, Photoshop is trying to do the same thing, but because the camera or subject have moved from one exposure to the next, Photoshop is merging parts of the subject that may not be in the same region from one layer to the next. You never quite know what you’re going to get, but with practice you can get an idea of what subjects, angles, lighting and lenses will yield the best results. (All of my images above were JPEGs captured with a Leica Q, 28mm, in full-auto mode.)

Not all resulting images are made with 360-degree coverage. For example, for “Walk this Way” I barely moved the camera between exposures. For “Cityscape #2” I purposely moved it a bit up/down, left/right between exposures. And for “Bike 363” I moved about 180 degrees around the motorcycle. In all cases, I’ve cropped the resulting images to emphasize the most interesting portion of the results.

Check out Roxanne’s other work and give this technique a try. It’s a lot of fun. And let me know how it goes!

Workflow: The NDOC “Tree Tunnel” Image

This image I made of a very popular location here in Marin County, California, generated a lot of online feedback. Because I used such a variety of post-processing tools and techniques, I thought it would be an interesting exercise to explain the workflow here. This presentation is an experiment and I look forward to hearing what you think of this format, particularly compared to screencasts and videos.

The slideshow below contains an image for each step in my process. If you hover over it you can pause it or move it forward or back. Below the slideshow is a scrolling area with the corresponding explanations. Click on any image to see it 2x larger. It should work on your mobile devices, too.

[slideshow_deploy id=’3305′]


  1. Original. This is the original image, converted without adjustment from a RAW file. Fujifilm X-E1, ISO 400, XF 18-55mm f/2.8-4 R LM OIS, 1/640 second, 55mm, f/5.6.
  2. ACR Basics. My preliminary work in Lightroom or Adobe Camera Raw is just to correct for lens distortion and to map the medium dynamic range RAW file down to the low dynamic range 16-bit image that is used in Photoshop. Here I reduce contrast and recover as much shadow and highlight detail as I can coax out of the RAW file. My goal is to end up with a low-contrast flat image.
  3. Endpoints. The previous step typically yields weak blacks and highlights. Now in Photoshop, I start by spreading the luminosity of the image across the entire dynamic range using a curves adjustment layer to set blacks about RGB=2 and whites at RGB=253. I skipped white-balance correction for this image because I knew I was going to B&W, but this is the point at which I would do that for a color image.
  4. B&W Conversion. I created a SmartObject copy and used Nik’s Silver Efex Pro 2 for the conversion to monochrome. With a more colorful original I typically start by adjusting the color sliders to control each color’s contribution to the b&w version, but in this case I made no global adjustments (color, contrast, brightness, structure, etc.) at all. Instead, I used about a dozen control points in the dark areas of the treetops to bring out some detail there. I also reduced brightness and increased the contrast of the building at the end of the road. I could have done these later, back in Photoshop (I did, in fact), but it seemed like a good time to deal with these issues.
  5. Levels. I’ll often drop in a levels adjustment layer to keep the white/black endpoints under control. Here I also increased the overall contrast after the b&w conversion.
  6. Dodge/Burn Roadway. I didn’t like the lightness of the road. I thought it attracted too much attention to itself rather than supporting the overall composition of the image. (You can switch back and forth between 5 and 6 to make up your own mind.) I also thought the splotchiness from shadows on the asphalt were distracting because they broke up the continuous flow of the roadway’s leading lines. This was a complex step using two curves adjustment layers and luminosity painting, a technique I learned from Tony Kuyper. One curves adjustment layer darkens (burns) the roadway and the leaves near the trees. The second curves layer lightens (dodges) a strip between those areas. The overall effect is to darken and even-out the roadway while increasing the contrast and strength of the lines leading to the building at the end of the road. Once I was done, I decided it was too strong, so I backed off the opacity of the two grouped layers to 78%. The advantage of using luminosity painting or a luminosity mask when dodging and burning is that you can retain and even increase contrast/detail in those areas.
  7. Mid-tone Contrast. So much of this image is in the mid-tones, so I brought out a bit more using a curves adjustment layer with a Basic Midtones luminosity mask.
  8. Dodge/Burn Trees. The light here was beautiful but unusual. Because of overcast skies and the dark canopy of trees, the trunks are actually getting side light from both sides. I wanted to increase the tunnel effect, so I didn’t want too much light on the insides of the tree trunks, particularly in the foreground. That one tree in the left foreground almost looked like it was hit with a strobe. (Compare to step 7.) As with the roadway (in step 6) I used two curves adjustment layers and painted with brushes loaded with luminosity mask selections. This is another good stage to compare, back and forth, with the previous one. It may look like I’m removing contrast and focus from the left and right sides of the frame, which is true. But I’m doing so to focus the viewer’s attention on the center.
  9. The Building. Although it’s not realistic — an overcast sky is almost always the brightest part of an image — I wanted the building at the end of the tunnel to be slightly brighter than the sky. Here I used a curves adjustment layer with an edited luminosity mask to brighten and increase the contrast of the building. After tweaking, I reduced the opacity of this layer to 39%.
  10. The Sky. To complete the effect above, I used another luminosity mask and a curves adjustment layer to darken the sky to just below the level of the building. I ended up weakening this effect too, backing off the opacity to 62%.
  11. Vignette. I wanted to darken selected areas, particularly around the periphery, so I painted with a very weak black brush into a new layer in Soft Light blend mode. Opacity 41%. I didn’t use a luminosity mask here because I didn’t want to maintain or enhance the contrast or detail.
  12. Touch-Ups. I should have done this much earlier in the process, but there were a few bright objects in the close foreground and on the roadway that were driving me crazy. I used a new layer and a combination of the Clone Stamp and Healing Brush tools to get rid of them. It’s hard to see unless you toggle between images 11 and 12 and look closely, primarily at the lower-left corner. I always use these tools in a separate layer because they’re then non-destructive and I can use the Eraser tool on them.
  13. PPW Sharpening. I frequently use the Sharpen 2013 action from Dan Margulis’ Picture Postcard Workflow, version 3.3. In fact, many of the steps in this workflow I learned from Dan. I ran the sharpening action on a copy of the image, flattened that image, then copied it back to a new layer in the original image. Rather then adjust the sharpening in that second (temporary) image, I often just keep the defaults and copy it back at full/normal strength. I then reduce the effect selectively with a layer mask or (in this case) globally by reducing the opacity of this layer to 45% to avoid over sharpening. The advantage of doing it this way is that since I don’t make any changes to the output of Dan’s action, I can re-create it at any time.
  14. Levels (2nd). After so many adjustments, the white & black points are often off, so I use another levels adjustment layer and the Auto button to bring things back into line.
  15. Warm Black. I decided the image was too cool, so I used an action I developed that warms the shadows (a gradient with black as r=9, g=4, b=0). I backed it off to an opacity of 75%.
  16. Original Color. After warming the image, I decided I wanted to see just a hint of the original color: the green in the treetops and some additional warmth in the leaves along the roadside. I added a new layer with a copy of the original image at 20% opacity in the Color blend mode. The effect is very subtle.
  17. Darken. After that warming and color, the image was too light for the effect I was looking for, so I used an unmasked curves adjustment layer to darken the image overall without affecting the endpoints.
  18. Global ACR Tweaks. At the very end, I wanted to add a bit of local contrast and crunchiness, so I created a merged copy, converted it to a SmartObject, then ran Adobe Camera Raw as a filter with the following global adjustments: Exposure=+0.15, Contrast=+6, Highlights=-31, Shadows=+71, Whites=+17, Blacks=+1, Clarity=+20 and Vibrance=+29 (for color). This last step really brought the image to life with a bit of that Halloween feeling I was going for.

(Un)Stiffed by Adobe

[Update: This issue has been resolved in my favor. It was a case of one hand not knowing what the other was doing. Although people on the Adobe Forum (including at least one forum staffer) insisted I didn’t qualify for the Photoshop Photography Program, they were in fact wrong. Not only that, but Adobe had already automatically switched my account from single-app Photoshop CC to the PPP bundle that included Lightroom 5. I accept some of the blame for not going to the My Account page on Adobe.com to check. But since I couldn’t find any info about his in the FAQs or other online Help pages, I thought I’d ask in the Forum.

Special thanks to Larry Nienkark who pointed out that he successfully received this upgrade. It caused me to check to see if I’d received it automatically as well…and I had!]

Continue reading

Photoshop: Fixing Those Shiny Faces

I was shooting a wedding rehearsal dinner in New York in a restaurant with dark walls and ceiling. No choice: I couldn’t bounce a flash off of anything white, so I had to use on-camera flash. I popped a Gary Fong Lightsphere onto the SB900 atop my Nikon D3s for the job. Although Gary’s “Tupperware” diffuser helps, you still end up with results like this. Obviously lit from just above the lens, and the awful glare from shiny skin.

Andrew & Mikey

But as luck would have it, I just returned from a four-day intensive workshop with color-correction.retouching guru Dan Margulis, where I learned a marvelous technique for improving those blown-out shiny highlights. After some experimentation, I came up with a variation of Dan’s technique. It works so well, I thought I’d share it with you here. The results are shown below.

Andrew & Mikey

The first steps are from Dan:

  • Dan’s technique requires that you switch to the Lab colorspace. Using my variation, you can stay in RGB.
  • Create an empty layer. (Dan uses a duplicate layer. I prefer to work in an empty one.)
  • Using the eyedropper tool, select an area with color near the blown-out highlight. This sets the foreground color.
  • Using the brush tool, paint that color over the shiny area. Dan sets the brush to Color mode. I paint in Normal mode, then change the layer to Color mode.

The results replace the white in the shiny area with color, but keep the luminosity. In Dan’s Lab version, this creates a color that Photoshop can’t render. It’s as bright as pure white but still has color. Since this isn’t possible in RGB or on your screen, Photoshop is forced to convert it to something else, which is why Dan’s technique works. I stay in RGB, then use the following additional steps:

  • Duplicate the layer you just created containing the touch-ups.
  • Switch it to Normal mode.
  • Dial back the Opacity to 30%-40%.

The result is similar to what Dan achieves in Lab, but I think you have a bit more control over it. Dan’s technique preserves virtually all of the contrast and texture. My version allows you to sacrifice some of that texture in order to reduce the highlights further. Give it a try!

Free Photoshop Actions: 1/4- and 3/4-Tone Masks

Inspired by the great work of Tony Kuyper and Mark Lindsay plus the video tutorials by Sean Bagshaw, I’ve just posted this 14-minute tutorial on how to use my new free Photoshop actions to enhance the 1/4- and 3/4-tone portions of your images.

Download the free Photoshop Actions. (My Photoshop Actions for 1/4- and 3/4-tone masks are not compatible with current versions of Photoshop. Beside, the latest version of Tony Kuyper’s TKActions Panel includes a superior tool for generating these masks.)

Luminosity — Photoshop Techniques (Part 1 of 2)

Why Luminosity? Without variations in brightness (tonality) a black-and-white image would be nothing more than a solid gray rectangle. But the same concept applies to color images as well. Without luminosity you wouldn’t be able to see the folds in a piece of fabric or the shape of a mountain. There would be no way to distinguish the light and dark areas of the same color. Luminosity, more so than color, is the key to defining shapes and showing detail in an image, b&w or color.

I’ve been on a three-year quest to understand how best to manage luminosity, particularly in Photoshop. My goal in Part 1 of this article is to explain what I’ve learned along the way towards my current luminosity workflow. Yes, I could simply jump to my current techniques, which I will instead cover in Part 2, but I think the evolution and order of presentation is important to developing a clear understanding of how the more advanced techniques work and how and when they should be used. Sorry to be such a tease, but I think you’ll thank me in the end.

I’ve pulled together these tools and techniques for managing and improving luminosity from a variety of sources. Almost none of them are of my own invention, and even those I thought were so clever turned out to be invented by someone else long before.

Although I’ve included a few examples and even some step-by-step moves, rather than describe every tool and technique in detail, I’ve opted wherever possible to link to a webpage or video that explains the technique better than I can do within the scope of this article.

Note: This article is based on my presentation to the Marin Photo Club’s Advanced Photoshop SIG in March 2013. Special thanks to Scott Loftesness for discovering and researching many of the techniques and resources described here and for providing feedback at various stages.

The Big Picture: Where Does Luminosity Adjustment Fit in the Workflow? After correcting camera/lens issues (chromatic aberration, distortion, white balance) and recovering highlights and shadows in Adobe Camera RAW (ACR), Lightroom, etc., the next step is to work on an image’s luminosity. This is true regardless of whether it’s a color or monochrome image.  In other words, luminosity adjustment comes right after initial RAW processing of an image either in Lightroom or ACR.

Hierarchy. Instead of grouping techniques according to the problems they solve (e.g., putting all the highlight-recovery techniques together), I’ve organized them according to the complexity of the concepts that underlie the techniques. The sequence is also more-or-less the order in which I learned the techniques as I’ve delved deeper and deeper into Photoshop and learned from the gurus of luminosity.

Below is an outline of those increasingly sophisticated concepts. These are not steps in a workflow. They’re just categories of different ways to understand and solve the same problems of adjusting the luminosity of an image. Over time, as your Photoshop skills improve and you learn more about these techniques, you’ll find you’re drawn to using those in the categories farther down the list.

Starting with the most basic, here are the techniques for dealing with image luminosity:

  • Global Adjustments. Alter the entire image using direct image adjustment or adjustment layer (e.g., Brightness/Contrast, Curves)
  • Local Adjustments. Use an adjustment brush (e.g., the Dodge and Burn tools) or a similar tool to affect only part of the image.
  • Global Adjustments with Masks. Use a global adjustment to alter the entire image, but control which portions are affected using a layer mask. The mask might be:
    • a manually created selection (affects specific areas)
    • a channel used as a mask (affects areas according to color and luminosity)
    • a luminosity mask (affects areas according to luminosity regardless of color)
  • Luminosity Replacement. Generate a new luminosity (layer or channel) using techniques such as:
    • use one channel (e.g., red, green or blue) to redefine the luminosity of all colors;
    • use one or more channels to redefine the luminosity of the image, selecting the areas, ranges or luminosity values affected using masks; or
    • creating a separate monochrome version of the image and using that to redefine the luminosity of the color image.
  • Luminosity Painting. Use any of the above techniques to create an enhanced luminosity layer, but apply that layer by brushing with an active selection (based on yet another channel/mask) to control where the effect is applied. I’ll explain luminosity masks and luminosity painting in Part 2 of this article.

Seeing the Luminosity. To view the luminosity of an image — we’ll assume for the rest of this discussion that we’re working with a color image — here are three techniques:

  • Desaturate the image. Image->Adjustment->Desaturate (⌘-shift-U on Mac).
  • In the Channels palette, look at each of the RGB channels separately (⌘-3,4,5 on Mac).
  • To see all ten usable channels (RGB, CMYK, Lab) get the Channels Power Tool (€20, highly recommended). The CPT plugin also simplifies applying channels to layers and masks, which we’ll use in later techniques.

The images below illustrate the before/after effect of the Desaturate command. Notice how similar the previously blue and yellow areas appear because they have very similar luminosity values. Also note that the number “1” on the hull is nearly invisible because it has almost the same luminosity value as the area immediately around it.

The four images below illustrate the contents of the individual color channels. Note, for example, how much difference there is between the blue and yellow areas in the B channel. Yellow is the complement of blue and hence appears very dark in the B channel. Also note how the number “1” on the boat’s hull appears much more clearly in the R channel than in the other color channels or the full RGB image. We’ll look at ways to use the R channel to enhance that detail in the color/RGB image later in this article. (Mark Lindsay’s Channeling Channels is a good introduction to the concepts of channels.)

Global Luminosity Adjustment Tools. Photoshop includes a number of tools in the Image->Adjustments menu for making adjustments to luminosity of the entire image. You may have thought they were too simplistic to bother with, but you should become familiar with each of them. There are many situations in which they’re more valuable than you might expect, particularly when manipulating masks. The same or similar tools are also available as Adjustment Layers, which is the preferred way to use them in most cases since Adjustment Layers are non-destructive. I generally only se the menu-based adjustments to increase the contrast of a layer mask — something I can easily restore if I’m not happy with the results.

  • Brightness/Contrast
  • Curves
  • Levels
  • Exposure
  • Shadows/Highlights
  • Threshold (sometimes useful in mask manipulation)

Below is a before/after example of a global luminosity adjustment (a Levels adjustment in this case).

Local Luminosity Adjustment Tools (Dodge & Burn). Dodging and burning are techniques every photographer should learn. As opposed to global changes in contrast and exposure, these local adjustments are where you really learn to producer richer images with more depth and detail. They’re also the basis for the most advanced technique we’ll cover in Part 2, luminosity painting.

There are a variety of ways to selectively dodge (lighten) and burn (darken) specific areas of an image. The simplest are the Dodge and Burn tools that have been a part of Photoshop for many years.

The Dodge and Burn tools are destructive, so before using them make a copy of the layer you want to adjust. The only way to reliably reverse the effect of these tools in their normal use mode is to use the Undo command. An advantage of these tools, however, is that you can elect to alter only the highlights, midtones or shadows of an image using a pull-down in the tool’s property area.

For example, if you dodge an area of high contrast that has both light and dark areas, the light areas will be lightened while the dark areas will be far less affected. Hence the contrast will be increased.

As we look at increasingly more powerful techniques, we’ll see better and better ways of dodging and burning your images.

Consider Working in Lab Color Mode. When working in the RGB colorspace, particularly when making substantial adjustments, increasing contrast using the above tools has the unwanted side effect of also increasing color saturation.

There are two solutions to this problem. The first (and my preference) is to use these tools in Lab color mode in which you can adjust the L channel (Luminance) independent of the a & b (color) channels.

Rather than convert your entire image to Lab (and possibly mess up some of the adjustments you’ve already made), use Image->Duplicate… and select Duplicate Merged Layers Only. Then convert the copy to Lab mode (Image->Mode), make your adjustments, merge the layers, and finally copy the Lab image onto the RGB version. The Lab image will appear as a new layer, which you can then temper with the Opacity adjustment.


Sidebar: Copying Images as Layers. A few students have told me they didn’t know how to copy one image onto another as a new layer. I couldn’t locate a short video on this topic, so here are the steps in longhand.

  • To start, your images must be exactly the same size (in pixels).
  • Enable the Move tool (keyboard shortcut: v).
  • Hold down the shift key, which tells Photoshop you want the source image to be aligned with the target image.
  • If you’re in tab-view mode, drag the source image to the destination image’s tab, but don’t release either the mouse button or the shift key. Wait for a moment for the destination image to appear, then continue dragging into the destination image itself. Release the mouse button and the shift key. 
  • If you’re in a tiled-view mode, drag and drop the source image to the destination image, then release the shift key.

For example, the left image below is the original. The center and right images show the results of Levels adjustments of gamma=0.35. The center one was done in RGB mode and illustrates the increased saturation. The right image was done in Lab mode and demonstrates that only the contrast has changed.

The Lab color mode is an extraordinarily powerful tool but beyond the scope of this discussion on luminosity. For more information on using Lab color, start with my post on Lab Color and My Workflow du Jour.

Get to Know Blend Modes and Blend-If. From here on, you should be comfortable with both blend modes and the blend-if options in Photoshop’s Layer Style dialog box. I’ve previously written an article on Blend Modes in Photoshop that should get you started.

Dodging and Burning with Blend Modes. Once you understand blend modes there are better ways to do almost anything when it comes to luminosity in Photoshop. Blend modes give us two better ways to do dodging and burning.

The first variation is to make your adjustments on a new layer in Overlay (strong) or Soft Light (weaker) blend mode filled with 50% gray. The advantage is that you can undo your dodging and burning either by using the Eraser tool or by painting with a 50% gray brush. The disadvantage is that you’ll no longer have the option of selectively altering the highlights, midtones or shadows.

The second technique is to paint with a black or white brush on a 50% gray layer set to Overlay or Soft Light blend mode. This has the same strengths and weaknesses as using the Dodge and Burn tools. I recommend two videos on this technique, both of which will also lead you to a slew of other great videos: Aaron Nace’s Dodge & Burn, and Sean Bagshow’s Dodge & Burn. If you’re new to or uncertain about blend modes, these videos will help.

Highlight/Shadow Recovery (Blend Modes). Another simple technique using blend modes is to enhance the brightest and darkest areas of your image.

You can’t truly recover blown-out highlights (or plugged-up shadows) with Photoshop, but you can to some extent darken (lighten) and increase the contrast in those areas to show more detail. (If your original image is in RAW format, you can recover at least some of the highlight and shadow information, but you need to do that in your RAW processing software — Lightroom, ACR, etc. — before bringing your image into Photoshop.)

To darken highlights, duplicate the background layer, then change the blend mode of the top layer to Multiply. This will darken everything, so go into Layer Styles and use the This Layer blend-if sliders (aggressively!) to restrict the darkening to only the highlight areas.

To lighten the shadows, do the same as above, but use Screen mode instead of Multiply and use blend-if to keep the effect out of midtones and highlights.

The four images below illustrate how these techniques can be used separately and together.

Masks and Selections. The above examples of highlight and shadow recovery were created using only blend modes and the blend-if feature. But to combine the recovered images into the final “Both” version I had to use a layer mask filled with a gradient. That’s because I couldn’t create a smooth transition of the midtones in the image (the background mountains and some of the red soil in the foreground) using blend-if.

You’ll frequently find that using continuous-tone masks such as gradients and masks created from the color channels (e.g., the red, green and blue channels) are very helpful in isolating the effect of your adjustments to specific areas or tones within an image. We’ll see much more about this in Part 2.

Because so much detail is contained in the luminosity of an image, you’ll likely find the traditional means of creating a selection or mask (e.g., the lasso tools, the quick selection tool and the magic wand) are far less helpful than you might expect. These tools create all-or-nothing rather than continuous-tone selections, and even if you try to adjust or soften their edges (e.g., using Refine Edge), you often don’t get what you want.

In Part 2 we’ll explore many opportunities to use color channels as masks. Not only are channels continuous-tone, they’re also self-feathering, guaranteeing smooth transitions between selected and non-selected portions of your image.

Furthermore, hard-edge selections create masks that contain no detail except at their edges, whereas masks made from channels retain all the detail from that channel.

Get to Know Channels and Apply Image. The techniques described in the remainder of this article require that you copy images or channels to layers or masks. There are a number of keyboard shortcuts, but they’re hard to remember and not very flexible. The fundamental tool for copying images or channels to other places is the Image->Apply Image… dialog box.

I suggest you read Harold Davis’ Using Image Apply Image on photo.net. Don’t be scared off by the length of the article. Alternatively you can search the Internet for Photoshop Apply Image Video to find many video tutorials on the topic.

Luminosity Enhancement Using Channels. The objective of luminosity enhancement is to bring out detail in desired areas of an image. Bringing out detail generally means increasing contrast within those areas, for it’s contrast that allows us to see detail.

Unless an image is strictly black-and-white, there is always more contrast in one of the color channels (R, G or B) than in the image overall. The most basic of the luminosity enhancements techniques is to replace the overall luminosity of the image with the luminosity of the color channel that has the most desirable contrast and therefore detail (using the Image->Apply Image… dialog as shown above).

The following channel-replacement technique is recommended by many of my personal Photoshop gurus: Mark Lindsay, Lee Varis and Dan Margulis. A good way to learn more is to start with Lee Varis’ free 10-Channel Workflow videos (Part 1Part 2Part 3Part 4). Part 2 deals specifically with the steps to perform this enhancement:

  • Open the Channels palette and select the best channel. That’s best in terms of contrast in the area you want to enhance. If you have the previously mentioned CPT plug-in, you can use it to generate a preview of not just the RGB channels, but also the CMYK and Lab channels.
  • Add a new empty layer and change its blend mode to Luminosity.
  • Use Image->Apply Image…  (or the CPT plug-in) to load the new layer with the selected color channel.
  • For even more detail, use a Curves or Brightness/Contrast adjustment to increase the contrast in the desired area.
  • Optionally, if you want to restrict the enhancement by color and/or luminosity, use the blend-if sliders in the new layer’s Layer Styles dialog box.
  • As a last resort, if you want to restrict the enhancement to a specific area, you can generate a layer mask. Using the bend-if method is preferred because it can be feathered, whereas creating a mask using selections often causes undesirable hard edges.
  • Note that if you’re working in the Lab colorspace, you can simply replace the L (luminance) channel rather than generate a separate layer in Luminosity mode.

The before/after images below illustrate the effect of using the red channel as the source for the luminosity layer in Lab color mode. Note that the “1” on the hull is much more clearly defined. The blend-if sliders were used to reduce the contrast increase in the blues, and this could be carried further using more of the techniques described in Lee Varis’ videos.

Doug’s Luminosity Shortcut. Although I cut my luminosity teeth on the channel-replacement techniques recommended by Varis, Lindsay, Margulis and others, I’ve pretty much switched to a simpler, quicker and in some ways more-powerful technique. I arrived at this technique by asking myself, “If the best luminosity for a color image is a good black-and-white image, why not just use the best tool for making b&w images?”

My personal favorite b&w tool is Nik’s Silver Efex Pro 2, and I’ve described the method of using that plugin for managing the luminosity of color images in Silver Efex Pro for Color Images.

Luminosity Masks and Painting. It was less than four months ago that I published Lab Color and My Workflow du Jour, an article whose title suggests that I’m quite frequently changing how I process images. While I’m still using some of the du Jour techniques and the Silver Efex Pro shortcut as appropriate, I now find I’m more often using another workflow based on luminosity masks. I find them to be extremely powerful, and once mastered, there quite easy to use.

To Be Continued. In Part 2 of this article I’ll explain the next level of luminosity adjustment techniques: luminosity masks and luminosity-mask painting, both of which I first learned from Tony Kuyper. If you can’t wait, see Tony’s articles on Luminosity Masks and Luminosity Painting.

Blend Modes in Photoshop

Last week we started an Advanced Photoshop SIG (special-interest group) at our local photo club. Based on a survey of our members, I chose Blend Modes as the topic for our first meeting. Here’s a cleaned-up version of the notes I used in preparation.

Here’s an image of 0%/25%/50%/75%/100% that you can use in a layer to see the monochromatic effects of blend modes. (Public domain. Click to enlarge.)

For example, here’s the above image in Overlay mode over another image. Note that in this mode, black darkens the image, white lightens the underlying image and 50% gray causes no change.

Here are some tutorials and tools:

(Thanks to Scott Loftesnsess for his recommendations to the above list.)

These are some of the techniques I demonstrated:

  • Scrolling Through the Blend Modes: Select the layer you want to change in the Layers palette. Select the Move tool. Use Shift- and Shift+ to scroll through all the blend modes and see their effects.
  • Difference Mode: Just as a demonstration of the more obscure and creative blend modes, set your brush to white in Difference mode at 20% opacity and paint directly on your image or a copy. Now change the brush to 100% and see what happens. (Don’t forget to return your brush’s blend mode to Normal, otherwise you’ll wonder why it doesn’t work correctly later on.)
  • Dodging: Duplicate the image, set to Screen mode, add a black mask and paint on the mask with 20% opacity white.
  • Better Dodging (Levels Adjustment Layer Trick): Duplicating your image in a new layer substantially increases the size of your .psd file, so instead of the above, try dodging this way: Add a Levels adjustment layer set to Screen mode. Paint 20% white on a black mask. Just as easy as above, but your layered files will be smaller.
  • Burning: Add a Levels adjustment layer set to Multiply mode, paint on a black mask with 20% white.
  • Even Simpler Dodge & Burn: All of the above are just experiments to show various options, but perhaps the best way to dodge and burn is to create a new blank layer set to Overlay mode, but don’t change the levels. (It’s just a dummy adjustment layer.) Paint with 20% white to dodge and 20% black to burn. Your file size will be small and the technique is totally non-destructive and reversible. You can erase your adjustments using the Eraser tool or a brush set to 50% gray color.
  • Exposure Control w/Gradient: In a new layer, draw a black-to-white gradient from top to bottom. Set to Overlay mode and adjust the opacity. While this works, you can’t move or change the gradient. So instead…
  • Gradient in a Layer Style: Don’t create a new layer. In the image layer, open the Layer Styles dialog (fx icon at the bottom of the Layers palette or just double-click in the blank space to the right of the layer’s title). Select the Gradient Overlay and (!) check the box. Select a black-to-white gradient (click the Reverse checkbox if necessary), set the gradient style to Linear. Play with Scale and Angle. Then switch the blend mode (of the gradient, not the layer) to Overlay and adjust opacity. Note that you can drag the gradient in your image area to reposition it! Now you have a non-destructive, changeable gradient tool.
  • Vignette in a Layer Style: Like above, but use a black-to-transparent gradient instead of black-to-white and the Radial gradient style. Experiment with the Overlay vs. Soft Light blend modes and the opacity. Unlike Lightroom you can’t change the squareness/roundness of the vignette, but that’s outweighed in some cases by that fact that you can reposition it.
  • Increase Luminosity Contrast: Duplicate the layer, set to Overlay blend mode and adjust the opacity. Works, but it pushes the lights and darks to extremes.
  • Better Way to Increase Luminosity Contrast: Duplicate the layer, from the menus select Image->Adjustments->Desaturate. Change the blend mode to Luminosity and adjust the opacity. You can also use a curves adjustment (to this layer only) to increase the contrast of the desaturated image and even use a mask to selectively add contrast in only certain areas of your image.
  • Even Better Way to Increase Luminosity Contrast: Use the Channel Power Tools plugin (see above) to preview all ten channels (RGB/Lab/CMYK). Select the channel that shows the most contrast in the desired portion of your image. Create a new layer and use CPT to apply the selected channel to that layer. (Or use Image->Apply Image… from the menu.) Select Image->Auto Contrast if necessary to quickly get a contrasty version, particularly if you selected either the Lab “a” or “b” low-contrast channel. Set the blend mode to Luminosity and adjust the opacity. Again, you can apply a Curves or Brightness/Contrast adjustment and a mask as above.
  • High-Pass Sharpening: Duplicate the layer. Select Filter->Other->High Pass… from the menu. Adjust the radius to define edges. Use a curves layer or Image->Auto Contrast or a Brightness/Contrast adjustment layer to increase the contrast, then set the blend mode to Overlay, then adjust the opacity.

I hope you find some of these techniques useful and that they help you understand the power of blend modes in Photoshop. Feel free to leave your feedback here.

Discovering Hidden Color

One of the primary benefits of working in the Lab colorspace is the ability to make very dramatic adjustments to color without affecting luminance. Take a look at the image below, which is pretty much straight out of the camera, a Sony NEX-7. (Click on the images to see them larger. It helps with this discussion.) While it appears dark and drab, you can see there’s some reddish-brown in the structure. When I saw them live, the hanging lights appeared pure white. But as you can see, they not only have a bit of color, but the color appears to vary from light to light.


My goal was to enhance the colors and to create a holiday red-and-green look to the scene. At the same time, I wanted to maintain the green in the small Exit signs. (Yes, you need to click and look at the larger version!)

Lab colorspace to the rescue!

The image below shows what I was able to do with not much more than a Curves Adjustment Layer in Photoshop in the Lab colorspace. I anchored the a & b channels at the zero-zero crossover point. I then steepened both a & b quite a bit to enhance the existing color. From there, I played with the a channel (green-magenta) until I got close to the red and green I was looking for, then added a bit of yellow in the b channel (blue-yellow).

By enhancing the color contrast I was able to bring out the shape and depth of the architecture. I was also able to turn what appeared to be white lights into an array of multi-colored ones. What you’re seeing in the lights is a substantial amplification of the color variations, thanks to very steep a & b channel curves in Lab color.

Note: I also used the ALCE v2 plugin (radius=180) to enhance the local contrast and emphasize the structure of the building.

Lab Color and My Workflow du Jour

I’ve lately been talking about photo post-processing workflows on various podcasts, Google+ hangouts, classes and workshops, which has generated a lot of questions and requests for more info. It’s my workflow du jour because I’ve never had a single workflow that’s lasted for more than a few weeks. By the time you read this, it will already be out of date. For that matter, I don’t really have a formal workflow since every image is different. But I’ve developed a default sequence as the starting point for most of the images I shoot. At least for this week.

I spent some time debating whether I would publish this blog post or not. I’m actually a bit nervous about telling everyone about some parts of the workflow — not because I want to keep them secret, but because I fear you will go directly to the shortcuts I recommend without taking the time to understand the concepts behind them. You can get pretty good results without studying the underlying theories, but you’ll be shortchanging yourself. Obviously, I’ve decided to go ahead with this post in the hope the tools not only simplify your post processing but also encourage you to dig deeper into how they work and how they can be further manipulated.

I should also point out that there’s nothing of my own creation in this workflow. Everything I’m using I’ve learned from others who know a lot more about post processing than I do. Towards the end of this article I’ve linked to the original work of my personal workflow gurus so you can learn directly from the sources.

What Are the Prerequisites?

Although much of my workflow uses automated Photoshop actions, some of the steps must be done manually. This is not for Photoshop newbies. Before utilizing any of the tips and tools in this article, you should first learn the following aspects of Photoshop:

  • selections
  • layers and layer masks
  • channels
  • curves
  • the Image->Apply Image… menu feature

What Are the Shortcuts?

My workflow du jour uses two Photoshop plugins. The first is Dan Margulis’ free Picture Postcard Workflow Panel shown below on the left. (The name is cute but misleading. It’s not just for a picture-postcard look.) The panel automates many of the steps in Dan’s Picture Postcard Workflow, which if done by hand not only make for a complex process but can’t be performed by mere mortals without pages of notes. You can really get yourself into trouble with this tool, but you can also achieve amazing results in no time at all once you get the hang of it.

The second Photoshop plugin, shown on the right, is the Channels Power Tool (€20). This is a tremendous timesaver for identifying and swapping channels and applying them as layers and masks such as in Lee Varis’ 10-Channel Workflow.

What About Lab Color?

Much of my current workflow is based on the Lab colorspace, which I’ve been using on and off for about 2.5 years. I first wrote about Lab color in 2010, specifically in conjunction with HDR. I stopped using Lab color for a while because I didn’t fully understand it. Although I’m still learning and experimenting, I now believe I’ve achieved a deeper comprehension of the true potential of working in this colorspace.

You’re probably familiar with the RGB colorspaces in which there are three channels: red, green and blue. Your digital camera records images in RGB and your browser displays images using RGB. When an image is printed using offset press inks, it’s converted to the CMYK colorspace with cyan, magenta, yellow and black channels.

Consider how you change the brightness or luminosity of an image in RGB or CMYK. In RGB you increase the levels of all three channels. 100% red, green and blue gives you white. 0% results in black. In CMYK, you reduce the amount of ink in all channels in order to get to white, the color of the underlying paper. But the problem with both RGB and CMYK is that there’s no way to change the luminosity of an image without also changing the hue and/or saturation of the colors.

When is Lab Better Than RGB or CMYK?

Lab is just another colorspace like RGB and CMYK, but it separates luminosity from color. There are three channels: The “L” channel controls luminosity but has nothing to do with color. Conversely, the “a” and “b” channels control only color and don’t affect brightness. The range or gamut of the Lab colorspace is huge. Not only can it represent every color of RGB and CMYK, it can also represent colors that are beyond reality. (Try to imagine a yellow that is simultaneously very saturated and as dark as pure black.) Lab is also an extremely accurate and standardized colorspace. Whereas we all need to calibrate our RGB monitors and adjust for our printers, papers and inks, the colors in Lab are precise. For example, when an automobile body shop wants to exactly match the color of your car’s paint, it uses the Lab color specified by the car’s manufacturer.

Unlike RGB and CMYK, the Lab colorspace is designed to approximate human vision, which has a powerful ability to segregate colors. For instance, we can perceive variations in green leaves where there may be very little luminosity difference. The channel structure of Lab allows us to manage both luminosity contrast, with which we’re all familiar, and (separately!) color contrast. The latter concept may be new to you. In RGB we have little opportunity to adjust the contrast of various colors, but in Lab color mode we can do just that. Photographs can often be improved by increasing the color contrast in order to enhance those differences.

Lab’s a and b channels specify opposing-color axes that you can visualize as a color wheel. The a channel specifies the green/magenta axis while the b channel represents the blue/yellow axis. (The image below is a bit misleading because it doesn’t show the variations from the center to the edges. Unlike RGB and CMYK, these are variations of pure saturation, not combined with luminosity.)

[CC-BY-SA-3.0] via Wikimedia Commons
When you add a curves adjustment layer in Lab color you can do things you’d never be able to accomplish in RGB. For example, you can warm up the saturated blue portions of your image without affecting the other less-intense blue areas, and do so without ever creating a layer mask. You can increase the contrast in the greens without shifting the overall cast of the image. It takes a while, but once you get the hang of it, working in the Lab colorspace is extraordinarily powerful.

Why Should I Use Lab Color in My Workflow?

Let’s start with an example. Below are three versions of a single image.

The above image is pretty much straight out of the camera. Note a few problems:

  • There’s a blue cast in the shadows.
  • There’s relatively little contrast either in luminosity or color.
  • The lack of contrast makes the image look flat and lacking in depth and detail.

The second version above is typical of what you can achieve with basic Photoshop skills. The color and contrast are somewhat better, but there’s still a blue cast to the shadows.

The final image above is the result of spending no more than five minutes tweaking in the Lab color space. I was able to remove the blue cast from the shadows as well as increase both the luminance and color contrasts.

Did I correct this image using only plugins and clicking on buttons? No. In this case I had to resort to creating curves in Lab color mode and to changing the opacity of various layers. Although I made all the changes to this image in less than five minutes, I did rely on some of these more fundamental and manual operations. I mention this as an example of why the shortcuts alone are often insufficient and why you need to learn the underlying concepts.

So What’s Your Workflow du Jour?

As of today, here are the steps I follow for many of my images, particularly landscapes, cityscapes and abstracts. Product shots (in which colors need to be accurate), portraits or other photographs that feature faces require a rather different approach and aren’t addressed here.

  • I process the RAW file in Lightroom.
    • Camera Calibration (I’ve created dual-illuminant profiles for each of my cameras.)
    • Lens Correction
    • Default Sharpening (minimal; just the equivalent of what the in-camera JPEG processor might do)
    • Noise Reduction
    • Chromatic Aberration removal
    • White Balance (overall correction)
    • HDR Merge: If it’s a multi-exposure HDR image, this is the point at which I use Photoshop’s Merge to HDR Pro and bring a 32-bit merged HDR image back into Lightroom. I make no adjustments while in Photoshop at this stage. [video]
    • Tonality: The goal here (still in Lightroom) is just to squeeze everything into a narrow dynamic range. RAW files and 32-bit HDR images typically have too wide a dynamic range and will need to be tonally compressed or tonemapped down to 16-bit RGB. I adjust the exposure, contrast, highlights, shadows, whites and blacks to create a low-contrast image in which everything (including highlights and shadows) is away from the edges of the histogram. My objective is a technical one, not to make the image look good yet.
    • Stop There: I do not use clarity, vibrance, saturation or anything else in Lightroom if I’m going to use the rest of this workflow.
  • In Photoshop, I start with a 16-bit RGB image from the above steps.
    • I perform any retouching other than color corrections.
    • Save this version as a .psd file with all layers in case I need to revert to this stage.
  • Dan Margulis’ Picture Postcard Workflow (PPW)
    • Using the Photoshop PPW Panel, I start at the top and work my way down, typically (but not always) using the actions listed below. For each action, I experiment with the visibility and opacity of the layers until I get the look I want. Occasionally I add a layer mask if the effects need to be localized. This is where it’s really helpful to understand what the PPW actions are doing behind the curtain.
    • Bigger Hammer for tonal contrast.
    • Switch from RGB to Lab color mode.
    • Color Boost and/or the Modern Man from Mars for color enhancement and contrast.
    • 2012 Sharpen
  • Lee Varis’ 10-Channel Workflow
    • If I can’t get the results I want using Dan’s PPW, I return to the pre-PPW saved .psd. I haven’t spent a lot of time in PPW so far, so I don’t worry about throwing away my work.
    • I use the Generate Preview button on the Channels Power Tool panel to look at all ten channels available from the RGB, CMYK and Lab colorspaces.
    • I use one or more of the channels to replace others or as luminance mask to bring out detail or color.
    • Once I’ve done the best I can using individual channels, I take the image through Dan’s PPW.
  • Final Touch-Ups
    • After all of the above (particularly sharpening) all my sensor’s dust spots magically appear, so I often make another cleanup pass at the end.

Where Can I Learn How to Do This?

You can download Dan’s PPW Panel and start using it immediately, but as I wrote at the beginning of this article, you’ll be far more effective if you invest the time to understand how the various actions work and Lab color in particular. The PPW Panel includes extensive Help files, but they’re not the best place to start. The Help file for Dan’s 2012 Sharpen action alone is 23 pages long.

Unfortunately, there’s a huge gap and a steep learning curve separating the use of the shortcuts and truly understanding how they work. Here are my recommendations (in order) of the resources you might use to learn about channels, Lab color and the rest of these workflow concepts:

  • Mark Lindsay teaches and writes about Lab color and related techniques. Mark has posted some of the best introductory articles, but he hasn’t yet gone very deep into his workflow. His articles include:
  • Check out Lee Varis’  Professional Photshop Toolkit. In addition to Dan’s PPW Panel, Lee’s toolkit includes:
    • Free videos covering Lee’s 10-Channel Workflow and many other topics. At this point you’ll be into swapping channels, using channels for masks and blending modes. You may never make another selection by hand again.
    • You’ll want to get the Channels Power Tool (€20). This is almost mandatory for Lee’s 10-Channel Workflow.
    • The False Profile Panel (free) is another plugin you’ll occasionally find useful once you get this far.
  • Download, install and use the latest Picture Postcard Workflow Panel for Photoshop. This automates most of what you’ve learned so far. Click on the Help button and read all of the associated PDF files. You’ll be busy.
  • Take a break from Dan’s extensive Help files, sit back and watch his videos on Kelby Training. If you’re not already a member, I suggest you sign up for one month (US$24.95) during which you can watch all these courses. It will be some of the best $$ you spend on photography.
    • Start with Introduction to Photoshop Lab Color.
    • Next, watch The Lab Frontier.
    • Work with what you’ve learned from Dan and try the techniques as explained by Mark Lindsay above.
    • Come back to Kelby and watch the courses on the Picture Postcard Workflow Part 1Part 2, and Part 3. These explain the manual processes of the PPW but pre-date the release of the PPW Panel.
  • You now qualify as an Lab color geek. Go directly to Dan Margulis’ Lab color bible, Photoshop LAB Color: The Canyon Conundrum and Other Adventures in the Most Powerful Colorspace. This will keep you really busy for a very long time!
  • For extra credit, now that you know all about channels, take your knowledge back to RGB and explore Tony Kuyper’s treatise on Luminosity Masks. (Note that the first steps in Margulis’ PPW are done in RGB, so Tony’s concepts work well here.)
What’s Next?

You’ve got to be kidding! It will take you months to get through the resources I’ve outlined above. And then you’ll want to go over them again to truly nail down the concepts. In any case, this is the point to which my knowledge of Lab color has progressed as of late November 2012. I’m in the process of my second pass through everything. It’s geeky, but it works for me. I hope it works for you as well.

As you have questions or learn of additional resources, please leave a comment and I’ll use it to update this page.

Updates

  • 11/25/12: Scott Loftesness and I have been collaborating together on this Lab-based workflow stuff for the past few weeks. Each of us has tried one technique or another, then to have the other adopt and improve on it. It’s been a valuable, mostly remote collaboration. Because these techniques can be so confusing at first and the learning curve so steep, I recommend you also find someone with whom you can study/learn with. More than once, Scott and I have needed the other to either explain a technique or at least remind the other what it was we’ve already learned. Scott has just posted an example of his own workflow du jour and it contains some very specific steps. I’m still digesting them myself and will see if I can (a) understand them, and (b) merge them into my own processes.
  • 11/25/12: Since posting the original article only two days ago, I’ve added the free Advanced Local Contrast Enhancer (ALCE) Photoshop plugin by Davide Barranca to my workflow. It’s like Lightroom’s Clarity feature, but on steroids. Make sure to check out the excellent video tutorials by Marco Olivotto.

HDR Workflows

Update 1/19/12: Based on feedback from many including John Omvik at Unified Color, I’ve improved my #1 workflow and substantially edited all the workflow descriptions below.

This is my first-ever high-dynamic-range (HDR) image, shot nearly three years ago. Since then my HDR workflow has changed quite a bit — almost weekly, it seems. As I’ve recently been running tests on some aspects of HDR processes and tools and particularly methods for transferring images between applications, I thought this would be a good time to pin down and document the workflows I’ve been using and explain why I’m still using them or not.

My primary applications are Adobe’s Lightroom (LR) and Photoshop (PS). I use LR to organize my images and for basic processing. I turn to PS for images that require adjustments beyond LR’s capabilities. The HDR tools I’ve used at one time or another include Photomatix ProLR/EnfuseHDR Efex ProHDR Expose 2 and its cousin, 32 Float. Note that all of these applications are available as free-trial versions. I encourage you to download them and experiment with these workflows.

Because you may not have some of these applications, I’ll describe seven different multi-image workflows as well as some for single-image HDR. My goal is to cover not only the tools and methods I’m currently using, but also those that I tried, tested and in some cases abandoned before settling on my current choices.

Workflow #1: 32 Float (with Photoshop)

I’ve recently started using Unified Color’s 32 Float for most of my high-quality HDR images. 32 Float is a PS-plugin version of HDR Expose. Given that I usually end up in PS anyway, this gives me a simpler workflow than I’d get with HDR Expose. I’m only giving up batch operations and a few functions that are better performed in LR or PS anyway. This is my current workflow for my highest-quality HDR images.

  1. Unless you’re shooting action/sports, which rules out multi-exposure HDR anyway, always shoot in RAW. Otherwise none of this applies to you.
  2. In LR, make only two adjustments to your images: lens correction and camera calibration, which can only be done at this stage. Defer everything else until your RAW files have been merged into a single 32-bit image. (I have camera profiles for each of my body/lens combinations made using a ColorChecker Passport.) Use Copy/Sync to apply the same adjustments to all the bracketed originals. If you’re not an LR user, you can instead perform the equivalent of this and the following step using Adobe Bridge and Adobe Camera Raw (ACR).
  3. Select the bracketed RAW files in LR then (from the Photo menu or ctrl/right-click) Edit in…Merge to HDR Pro in Photoshop. Importantly, and unlike some other Edit in… and Export options, Merge to HDR Pro sends full-range 32-bit files to PS, even if you’ve made adjustments in LR. This launches PS’s own HDR Pro module. [PS’s tonemapping is weak, which is why all these third-party tools exist. But the merge-to-HDR function seems to work as well as any other.] In Merge to HDR Pro don’t be alarmed if you don’t see your highlight or shadow details. You’re only looking at a low-dynamic-range (LDR) preview of the HDR image, which can’t be properly displayed on your monitor.
  4. In HDR Pro set the Mode to 32 Bit and click OK. This merges the originals to create a 32-bit HDR image, then opens it as the Background layer in PS.
  5. Launch 32 Float from PS by selecting Filter…Unified Color…32 Float.
  6. In 32 Float tonemap the HDR image to low-dynamic-range (LDR). Many operations are best done here, while you’re in 32-bit mode and your luminance data are separate from your color data. Go ahead with global changes such as sharpening, noise reduction, local contrast and color and tone adjustments, but I’d stay away from dodging and burning in particular. At least in the version I have, there’s no undo feature, so an erroneous burn can wipe out what you’ve done, just like in a wet darkroom!
  7. You’ve now done pretty much all you can do in 32-bit mode, so set Upon Apply Convert To to 16 bpc. This will return a 16-bit image back to PS and change PS to 16-bit RGB mode. It’s also better to change to 16-bit mode while you’re still in 32 Float since there can be some rather quirky artifacts when the 32-to-16 bit conversion is done within PS.
  8. Back in PS, decide whether you want to merge in any of the original exposures. I will often do this in cases where there are ghosts such as people in different positions or if there are artifacts, details, tones or colors that are much better in one of the original images than in the merged one. If so, go back to LR, select the original RAW images and click on PhotoEdit In…Open as Layers in Photoshop… Back in PS, select the merged image then use Layer…Duplicate Layer to copy it as the top layer in the RAW-image stack. Use layer masking and other tools to manually combine your  originals and the merged image.
  9. Further tweak the combined image as necessary. If you need a filter that’s only available in 8-bit RGB mode such as Pixel Bender, Distort or the Topaz Labs suite, change the Mode to 8-bit RGB, but do so as late as possible. Otherwise keep the image in 16-bit mode.
  10. Click Save, which returns the image to LR.
  11. In LR do your cropping, final sharpening, noise reduction and vignetting.

Workflow #2: HDR Expose (without Photoshop)

This variation is designed for those who either don’t have PS or just prefer to do all their retouching in LR.

  1. Don’t make any adjustments in LR’s Develop module. The one exception might be if you need to correct for severe chromatic aberration, which is quite difficult to do later in the workflow.
  2. Select the bracketed RAW files in LR then select File…Export…Merge and Edit in HDR Expose. This uses HDR Expose’s alignment and merge engines instead of PS’s. Important: Make sure you select Merge and Edit Original Image(s) in the Export dialog box. This will send your RAW files directly to HDR Expose. If you select Merge and Edit Images with Lightroom Adjustment(s) you will be sending LDR 16-bit TIFF files and thereby throwing away a lot of important data. The only time to use this option is if you corrected chromatic aberration in step #1. It’s a tradeoff. [There’s a workaround for this tradeoff: You can make adjustments in LR’s Develop module. (I’d suggest limiting them to lens correction and camera calibration.) Then Export your set of bracketed RAW images as DNG files. This retains their full 32-bit range. You can then start HDR Expose as a standalone application and merge the saved DNG files.]
  3. Tonemap and adjust the image in HDR Expose.
  4. Click OK and save the image as a 16-bit TIFF. It will be returned to LR.
  5. You have the option at this stage to perform additional processing on the merged LDR image in PS. Use Edit in…Photoshop CS5 to export to PS. When you’re done, Save will return the results to LR.
  6. Crop, sharpen, reduce noise and vignette in LR.
  7. Continue with step 8 in Workflow #1.
Workflow #3: LR/Enfuse

Before a friend told me about HDR Expose and 32 Float, this was my first choice for HDR merging and tonemapping. Not only is it free (donationware, actually) it’s also fast and simple and produces a fairly linear tonemapped image ready for additional adjustment. LR/Enfuse is the open-source Enfuse command-line utility packaged as a LR plugin.

  1. Select your bracketed RAW images in LR.
  2. In the LR menu, select File…Plug-in Extras…Blend exposures using LR/Enfuse…
  3. In the Output tab select 16-bit ProPhoto TIFF and Reimport image into Lightroom.
  4. LR/Enfuse will perform the HDR merge and tonemapping. Although you can make some adjustments before it runs, there’s no interactive preview.

The tonemapping in 32 Float, HDR Expose and LR/Enfuse generally give me the most realistic results. But occasionally I want a less-realistic look, in which case I typically turn to Photomatix Pro. There are three different ways to use this utility, depending on the balance you want to strike between simplicity/speed and quality/control.

Workflow #4: Photomatix Tone Mapping Plugin for Photoshop

This plugin is sold separately by HDRsoft. It’s the best way to use Photomatix Pro with PS.

  1. Follow steps 1-4 in Workflow #1.
  2. Launch the Photomatix plugin by selecting Filter…Photomatix…Tone Mapping…
  3. In Photomatix tonemap the HDR image to LDR and make other adjustments. I tend to use default settings here, waiting until I return to PS to make further changes.
  4. Click OK, which returns a 32-bit HDR image to PS.
  5. Don’t worry if the LDR preview of the 32-bit HDR image looks all wrong in PS. Click on Image…Mode…16-Bits/Channel.
  6. If you want the double-tonemapping look, you can make further tweaks in this second HDR Toning step.
  7. Continue with step 8 in Workflow #1.
Workflow #5: Photomatix Pro (with Photoshop but without the Plugin)

If you want to work with PS but don’t want to buy the Photomatix Tone Mapping Plugin for Photoshop, this variation works fine. It’s just a little more complex.

  1. Follow steps 1-4 in Workflow #1.
  2. Save the HDR image as a Radiance (.hdr) file in a temporary location. (You don’t need to keep this for archival purposes since it is easily reproduced from the RAW images at any time.)
  3. Start Photomatix Pro and open the .hdr file.
  4. Use tonemapping and other adjustments to create an LDR image from the HDR image.
  5. Save the LDR file as a 16-bit TIFF and Import (Copy) it into LR. Use a filename that will place it near your originals in the LR grid view.
  6. If you need to make PS adjustments, use Edit In…Photoshop CS5, and return the results to LR as another LDR 16-bit TIFF.
  7. Continue with step 8 in Workflow #1.

Workflow #6: Photomatix Pro (without Photoshop)

This workflow bypasses PS altogether, moving images from LR directly to/from Photomatix Pro. This process is fine for some HDR images, but it has certain weaknesses. First, it depends on Photomatix Pro to perform the HDR merge and image alignment — functions performed better by PS.

  1. Select the bracketed RAW files in LR then select File…Export…Photomatix Pro. But make sure you change the File Settings in the Export One File dialog box to DNG. If you don’t do this, you’ll be sending LDR images to Photomatix Pro and therefore losing highlight and shadow detail. (For an in-depth explanation, see Are You Wasting Dynamic Range?)
  2. Photomatix Pro will merge the DNG (RAW) files into an HDR image.
  3. In Photomatix Pro use tonemapping and other adjustments to create an LDR image from the HDR image.
  4. Click on Save and Re-Import and Photomatix Pro will return a 16-bit TIFF to LR.
Workflow #7: HDR Efex Pro

Nik Software’s HDR Efex Pro is the new kid on the block. While I like Nik’s control-point UI and have settled on their Silver Efex Pro as the #1 plugin for monochrome, HDR Efex Pro has become a tool I don’t use much any more. But many people use it, so I’ve included it in my workflows.

  1. Follow steps 1-4 in Workflow #1.
  2. In PS select Filter…Nik Software…HDR Efex Pro. 
  3. After tonemapping and possibly making other adjustments in HDR Efex Pro click OK, which returns a 16-bit LDR image to PS.
  4. Continue with step 8 in Workflow #1.
Single-Image HDR

When your source is just a single RAW file, there’s no need for the Merge to HDR Pro step. In fact, you can’t run Merge to HDR Pro with just one image. In this case you need to get your RAW file to your tonemapping utility as directly as possible. Starting in LR, use one of these tools, ranked in order of my personal preference:

  • LR/Enfuse: Because it’s simple, this is a workflow I sometimes use for single-image HDR. Just follow the same steps described for Workflow #3.
  • Photomatix Pro: You can’t send a single RAW image through PS to the Photomatix Tone Mapping Plugin, but you can export a single RAW image directly to Photomatix Pro, which automatically returns the resulting image to LR. Use File…Export…Photomatix Pro, but make sure you change the File Settings in the Export One File dialog box to DNG as described in Workflow #6 for multiple source images using Photomatix Pro.
  • HDR Expose: This workflow is more cumbersome than using LR/Enfuse or Photomatix Pro, but it’s the process I use for single-image HDR if I’m not satisfied with the results from the simpler tools. HDR Expose is the standalone version of 32 Float, and it can open one or more RAW files directly. Unfortunately it can’t deal with a single image exported from LR, so you need to start HDR Expose and open the file from there. This means you’ll have to save the output of HDR Expose as a file (typically a 16-bit TIFF) then import that back into LR.
  • 32 Float: Because PS’s Merge to HDR Pro won’t accept a single RAW image, the only way to get the full dynamic range of a single RAW image into PS is via the extended-EV TIFF method, described below.
  • HDR Efex Pro: This application does not include a RAW file processor. The only way I know to preserve the full dynamic range of a single RAW file for HDR Efex Pro is to use the extended-EV TIFF method.
The Extended-EV TIFF Method

This is a method for recovering data from RAW files when the tools you’re using cannot read those RAW files directly. It is not required or recommended for any of the multi-image workflows above. The only time I use it is when I want to process a single RAW file using 32 Float or HDR Efex Pro, which is now pretty much never. You’re probably better off just using another tool such as LR/Enfuse, Photomatix Pro or  HDR Expose, but if you don’t have one of those applications or plugins, the following is your best choice.

I first learned this technique from Klaus Herrmann in the section in his online HDR Cookbook entitled Creating HDR Images the Right Way. (Look for the Five TIFFs method.) A RAW file can contain image data from the darkest shadow detail to the brightest highlights, spanning a range of 10EV-12EV. But an LDR file such as a 16-bit TIFF can only represent 6EV-8EV. The idea of the extended-EV TIFF method is to replicate the wide dynamic range of data found in a RAW/HDR image using a bracketed set of LDR TIFFs from that image. Each TIFF file will contain the data from a different (but overlapping) portion of the RAW image’s brightness range.

  1. Open the RAW image in a RAW file processor application such as Lightroom, Adobe Camera Raw (Photoshop), Phase One’s Capture One Pro, Nikon’Capture NX2, etc.
  2. Using the app’s Exposure slider or equivalent, reduce the luminosity by 4EV.
  3. Save the image as a 16-bit TIFF, preferably in the ProPhoto RGB colorspace, with a filename that both identifies the original image as well as the adjusted EV. Something like “IMG1234_-4ev”.
  4. Repeat the previous two steps so you end up with five TIFFs, one each with exposure adjustments of -4EV, -2EV, 0EV, +2EV and +4EV.
  5. Check the +2EV and +4EV images and decide if they should be included in the set. While the -4EV and -2EV are very likely to include extra highlight data that appears blown out in the 0EV image, the same is often not true for shadow recovery. If the +2EV and +4EV images don’t contain true shadow detail that doesn’t appear in the next-lower-EV image, don’t use them — they won’t add detail to the shadows, but they will increase the noise.
  6. Treat these three, four or five images as bracketed originals and submit them as input to your HDR merge application such as HDR Pro (Photoshop), HDR Expose, Photomatix Pro and HDR Efex Pro. You can see the results of my tests of this method at HDR Tools Comparison.

If you’re working with multiple bracketed RAW originals and you’re still getting blown-out highlights when tonemapping, you may be able to recover them using a variation of the extended-EV TIFF method:

  1. Create a 16-bit ProPhoto RGB TIFF with no exposure adjustment from each RAW original.
  2. From the darkest (lowest-EV) RAW image, create two additional TIFF files: one darkened an extra -2EV and another at -4EV.
  3. If you started with three RAW images, for example, you’ll now have five TIFFs.
  4. Use these TIFFs instead of the RAW files as the source images for your HDR merge process.
  5. As with the single-RAW image variation, you can also try +2EV and +4EV TIFFs made from the brightest RAW image, but again to avoid noise don’t use them unless they provide details in the shadows that don’t already appear in a lower-EV image.

[Please post all comments questions on this Google+ page since there are far more photographers there than are reading this blog.]