My friend, Roxanne Bouché Overton (roxanne_overton on Instagram) has been developing a collection of techniques she calls Intentional Camera Movement or ICM. Many of her images are just that: moderately long exposures (perhaps 1/10 to 1 second) during which she moves the camera up, down, side-to-side, perhaps in a curved motion, forward/back or zoom in/out. As you can see from her Instagram feed, she’s become quite good at it.
But a few days ago I attended a presentation she gave, and at the end she showed the results of another variation on the technique. Here are two of her images. I think you can see why I was intrigued.
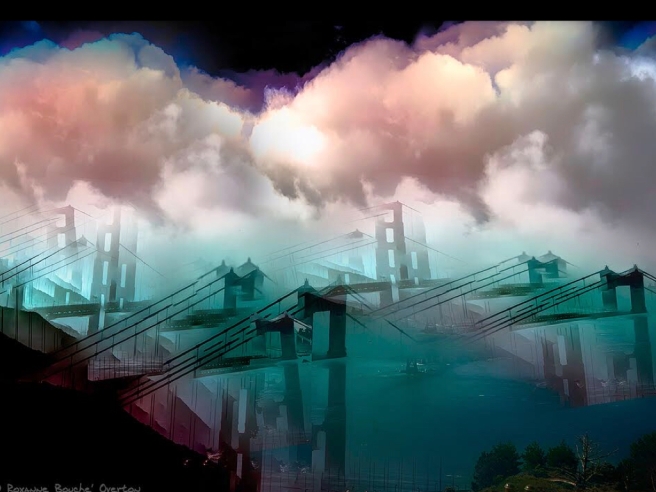 Photo by Roxanne Bouché Overton
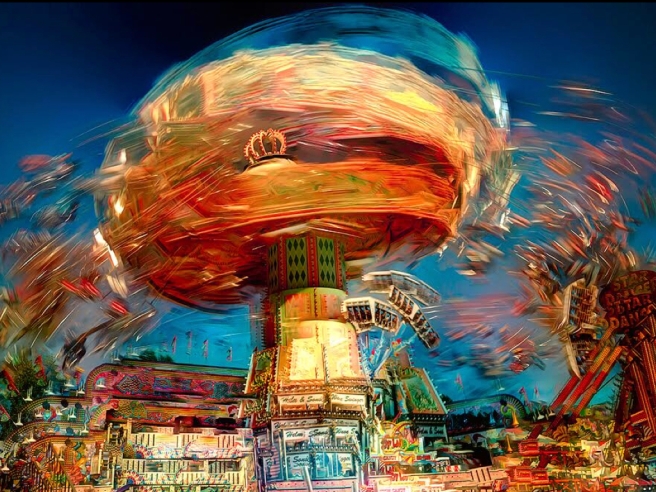 Photo by Roxanne Bouché Overton
Based on what she explained, I decided to give it a try. Here are my first results:
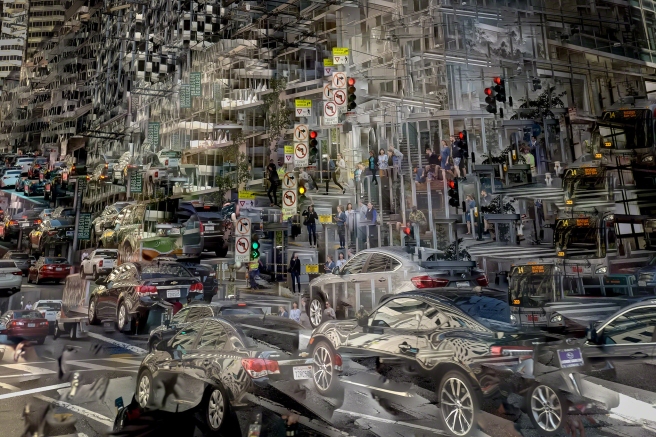
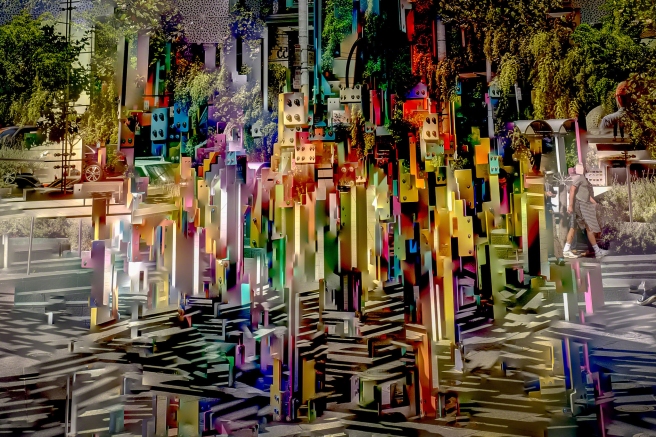 “Cityscape #1” by Doug Kaye
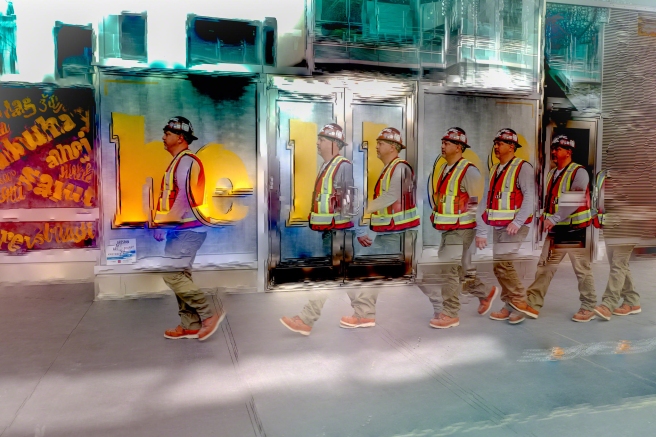 “Walk This Way” by Doug Kaye
 “Cityscape #2” by Doug Kaye
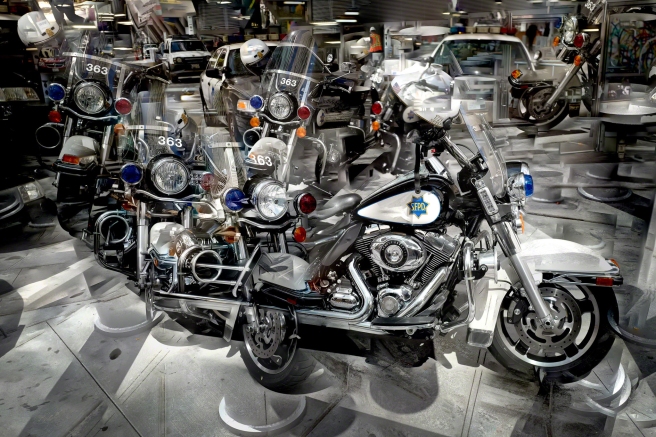 “Bike 363” by Doug Kaye
So, how do you do this? It’s remarkably simple.
First are the exposures. Unlike Roxanne’s other ICM work, these are not long exposures, but rather traditional short-exposure shots. There are multiple handheld images. In the case of “Cityscape #1”, I photographed a street sculpture by walking around it, shooting about 20 images from all 360 degrees. Here are two samples of the individual images:
From Lightroom, I selected all the images, then [Photo…Edit in…Open in Photoshop as Layers]. Once in Photoshop, I selected all the layers, then [Edit…Auto-Blend Layers…]
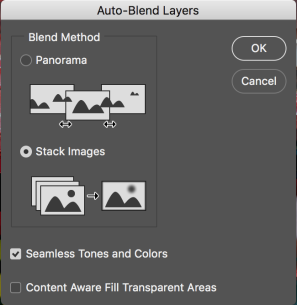
(Note that sometimes I check Seamless Tones and Colors, but other times it works better without.)
That’s it! Seriously. It’s almost embarrassingly simple. I flatten the image (merge the layers) and save. The resulting image is automatically returned to Lightroom.
What’s going on here? Auto-Blend is typically used for processing focus-stacked images, most often for macro photography. Photoshop creates a layer mask for each image (layer) then analyzes the overall image, one very small region at a time. For each region, it looks at each layer and determines which layer can provide the sharpest sub-image for that region. It then “masks in” that region on that layer. When the layers are merged, you have an image with the maximum sharpness in each region.
But that’s for focus stacking. In this technique, Photoshop is trying to do the same thing, but because the camera or subject have moved from one exposure to the next, Photoshop is merging parts of the subject that may not be in the same region from one layer to the next. You never quite know what you’re going to get, but with practice you can get an idea of what subjects, angles, lighting and lenses will yield the best results. (All of my images above were JPEGs captured with a Leica Q, 28mm, in full-auto mode.)
Not all resulting images are made with 360-degree coverage. For example, for “Walk this Way” I barely moved the camera between exposures. For “Cityscape #2” I purposely moved it a bit up/down, left/right between exposures. And for “Bike 363” I moved about 180 degrees around the motorcycle. In all cases, I’ve cropped the resulting images to emphasize the most interesting portion of the results.
Check out Roxanne’s other work and give this technique a try. It’s a lot of fun. And let me know how it goes!

 My 2018 Tesla Model 3