Nine months ago I reviewed the Sony NEX-7 mirrorless camera (parts one, two and three) and eventually bought one as the small camera alternative to my larger Nikon lenses and bodies (D3s, D800E, D600). It’s been a love/hate relationship ever since. The sensor in the NEX-7 produces great images, but its high-ISO performance isn’t anything to write home about. The lens selection is remarkably weak because Sony’s E-mount is both proprietary and relatively new. A few good third-party lenses are starting to appear but the pickin’s are thin.
My biggest complaint about the NEX-7 is the awful menu system and the so-so controls. It was too easy to hit the video record button by accident, so Sony developed a firmware update that added a menu option to disable the button. But the fact is that many of my best images made over these past nine months were taken with the Sony NEX-7. So how much can I complain?
Buyers Remorse? After spending $2,000 on an NEX-7 body and two lenses, I kept having this nagging feeling that I should have instead gone with a micro four-thirds (M4/3) camera and therefore been able to choose from a much wider variety of lenses. Many friends love their M4/3 cameras so I just had to check one out. After reading a few reviews and asking some of those friends, I decided to rent an Olympus OM-D E-M5 along with two Olympic lenses: a 14-150mm f/4-5.6 superzoom and a 9-18mm f/4-5.6, for a long weekend.
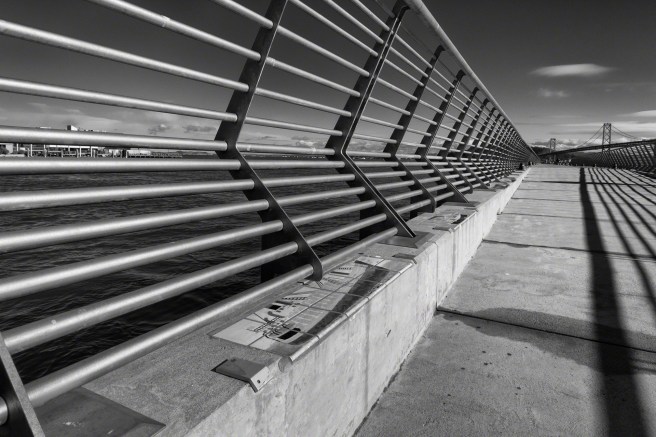
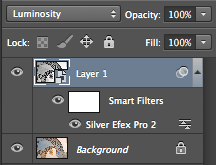
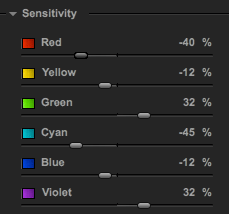
[All images in this post were taken with the Olympus OM-D E-M5, but with a substantial amount of Photoshop and Silver Efex Pro post-processing.]

Ergonomics. I loved shooting with this camera. It feels good in the hand. The shutter release is responsive. The built-in electronic viewfinder is bright and clear. I actually like it more than the NEX-7’s EVF, which is also very good. One thing I missed, however, was the NEX-7’s focus-peaking feature for manual focusing.
The touch-sensitive rear LCD is terrific. It took a few minutes to figure out how to activate the on-screen touch menu from all modes, but once I mastered that, the menu “buttons” worked great for me. The LCD also tilts both up and down unlike the Sony’s, which only tilts up. I found myself taking many shots with the screen tilted up, holding the camera at knee level. And for someone with old creaky knees like mine, this is a great way to get low angles. I find I can’t do this as easily using the Sony’s LCD because it’s not as bright and is hard to see in daylight. The OM-D’s screen is much brighter.
Another advantage of the OM-D’s LCD is when you want to shoot an image (or video!) holding camera above your head. Because the LCD tilts down, this is easy. On the Sony, you have to hold the camera upside-down. And have you ever tried to rotate video 180 degrees in post-production? It’s not as easy as I thought it would be. Some of the Panasonic M4/3 cameras have LCDs that fully articulate, which I imagine would be even more useful.
The Olympus LCD has two modes that I found surprisingly useful. One is a touch-to-focus feature like you find on many smartphone cameras. But the other mode goes the extra step to focus-and-shoot. It’s fast and responsive and for some situations it’s really handy.
Other Features. The bracketing options are fairly good although the maximum exposure step is only +/-1EV. For the image at the top f this article, I had to shoot five images and delete two of them.
Normally I shoot everything in aperture-priority mode, but I’ve recently been using program (P) mode and auto-ISO for street photography. The OM-D E-M5 makes very good choices in these modes (better than my Nikon D600) and is easy to override for specific situations.
I shot everything in RAW mode, so I didn’t experiment with the scene/picture processing features.

Lenses. As much as I liked shooting with the camera, I was very disappointed with the resulting images when I offloaded them to Lightroom. All of the images were softer than I expected. They were also fairly flat and low contrast and many exhibited a lot of chromatic aberration (CA). After consulting with Gordon Laing at Cameralabs, I learned I had been testing with a set of lenses known not to be be particularly good.
Of the three lenses I borrowed or rented, the 9-18mm (18-36mm full-frame equivalent) was the best, although still not great. I’m not normally a wide-angle shooter, but I had a lot fun with this lens. It was great for those knee-level street shots.
The 14-150mm superzoom was generally horrible. Yes, I was able to get a usable image (last one in this post), but it took a lot of work in post. I love the equivalent 28-300mm zoom on my big Nikons, but I’d suggest staying away from this M4/3 lens.
I also borrowed an older 14-24mm f/3.5-5.6 — thanks, Janice — and while it was somewhat better than the superzoom, it’s still not a lens I would buy. Of the three, I would only consider the 9-18mm, and even then I’d be willing to pay more money for something a little sharper such as the Panasonic Lumix 7-14mm.
Okay, so much for dumping on these Olympus lenses. On the other hand, I found the in-body image stabilization to work very well. I also like that it’s easy to disable in either or both the horizontal and vertical axes.

Overall. I learned a lot about M4/3 cameras from using the OM-D E-M5, reading other reviews and in particular from Gordon Laing. Some random points:
- One property of “micro four-thirds” cameras is the use of a 4:3 aspect ratio. I never knew that! I’m so used to a 3:2 ratio from full-frame and APS-C cameras, I found it hard to adjust over the course of just a few days. I usually shoot with printing in mind and I just couldn’t quite get my head around this more-square format. Of course I can crop to any aspect ratio, but I guess I’m just easily confused.
- There are no Lightroom or Adobe Camera Raw profiles for Olympus M4/3 lenses. I couldn’t figure out why until I learned that the lenses all contain their own profiles and embed them directly into the RAW files. When you open a file in LR or ACR, the application applies the profile to correct the distortion without your even asking. (I wonder if there’s even a way to see a truly “raw” image from these cameras.)
- Gordon pointed out that Panasonic corrects for CA within their M4/3 bodies, which Olympus does not. Using LR or ACR to correct for CA is a must, at least for the three lenses I used. Even then, you can’t fix it all.
- As far as good lenses, Gordon says “the action is with the primes”. He likes the Leica 25mm f1.4, the Olympus 45mm f1.8 and although it’s a zoom, the Lumix 7-14mm.
- Gordon also explained that these small lenses all suffer from diffraction at f-stops tighter than f/4 or f/5.6. Of course, I learned this after I returned my rental gear, but perhaps that explains at least some of my disappointment in the lenses. And as Gordon also reminded me, due to the difference in sensor size, f/5.6 on a M4/3 camera delivers the same depth-of-field as f/11 on a full-frame body. I probably would have done better to shoot wide open or close to it.
- Finally there’s one feature of the OM-D E-5M that I wanted to play with but never had time: Live Bulb: You shoot in Bulb mode and the LCD shows the accumulated image, updated over time. I can think of all sorts of ways to take advantage of that for long-exposure work.
In summary, what do I think of micro four-thirds in general and the Olympus OM-D E-5M in particular? I think I need to try it again. Next time I’ll get some better lenses and I’ll shoot at wider apertures. And rather than the OM-D E-5M, I may try the Panasonic Lumix DMC-GH3. I’m hearing great things about that body. And of course, by the time I get around to it, both Panasonic and Olympus will probably have announced even better bodies. Once again, it’s all about the glass. The bodies change too quickly.


