HDR Workflows

Update 1/19/12: Based on feedback from many including John Omvik at Unified Color, I’ve improved my #1 workflow and substantially edited all the workflow descriptions below.

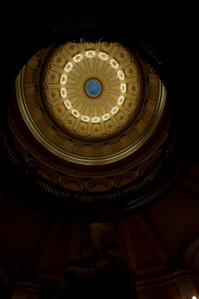
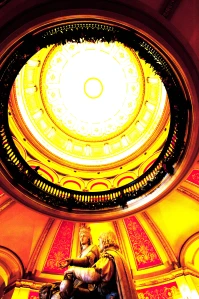
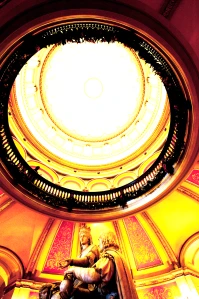
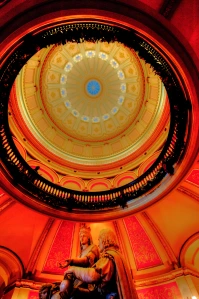
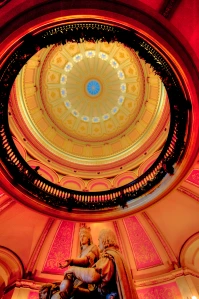
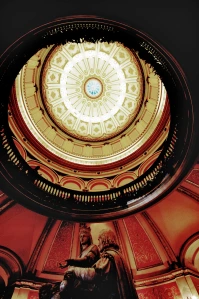
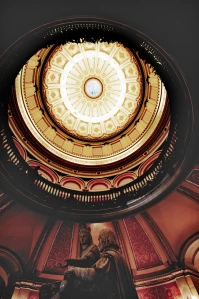
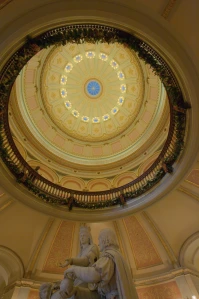
This is my first-ever high-dynamic-range (HDR) image, shot nearly three years ago. Since then my HDR workflow has changed quite a bit — almost weekly, it seems. As I’ve recently been running tests on some aspects of HDR processes and tools and particularly methods for transferring images between applications, I thought this would be a good time to pin down and document the workflows I’ve been using and explain why I’m still using them or not.

My primary applications are Adobe’s Lightroom (LR) and Photoshop (PS). I use LR to organize my images and for basic processing. I turn to PS for images that require adjustments beyond LR’s capabilities. The HDR tools I’ve used at one time or another include Photomatix ProLR/EnfuseHDR Efex ProHDR Expose 2 and its cousin, 32 Float. Note that all of these applications are available as free-trial versions. I encourage you to download them and experiment with these workflows.

Because you may not have some of these applications, I’ll describe seven different multi-image workflows as well as some for single-image HDR. My goal is to cover not only the tools and methods I’m currently using, but also those that I tried, tested and in some cases abandoned before settling on my current choices.

Workflow #1: 32 Float (with Photoshop)

I’ve recently started using Unified Color’s 32 Float for most of my high-quality HDR images. 32 Float is a PS-plugin version of HDR Expose. Given that I usually end up in PS anyway, this gives me a simpler workflow than I’d get with HDR Expose. I’m only giving up batch operations and a few functions that are better performed in LR or PS anyway. This is my current workflow for my highest-quality HDR images.

  1. Unless you’re shooting action/sports, which rules out multi-exposure HDR anyway, always shoot in RAW. Otherwise none of this applies to you.
  2. In LR, make only two adjustments to your images: lens correction and camera calibration, which can only be done at this stage. Defer everything else until your RAW files have been merged into a single 32-bit image. (I have camera profiles for each of my body/lens combinations made using a ColorChecker Passport.) Use Copy/Sync to apply the same adjustments to all the bracketed originals. If you’re not an LR user, you can instead perform the equivalent of this and the following step using Adobe Bridge and Adobe Camera Raw (ACR).
  3. Select the bracketed RAW files in LR then (from the Photo menu or ctrl/right-click) Edit in…Merge to HDR Pro in Photoshop. Importantly, and unlike some other Edit in… and Export options, Merge to HDR Pro sends full-range 32-bit files to PS, even if you’ve made adjustments in LR. This launches PS’s own HDR Pro module. [PS’s tonemapping is weak, which is why all these third-party tools exist. But the merge-to-HDR function seems to work as well as any other.] In Merge to HDR Pro don’t be alarmed if you don’t see your highlight or shadow details. You’re only looking at a low-dynamic-range (LDR) preview of the HDR image, which can’t be properly displayed on your monitor.
  4. In HDR Pro set the Mode to 32 Bit and click OK. This merges the originals to create a 32-bit HDR image, then opens it as the Background layer in PS.
  5. Launch 32 Float from PS by selecting Filter…Unified Color…32 Float.
  6. In 32 Float tonemap the HDR image to low-dynamic-range (LDR). Many operations are best done here, while you’re in 32-bit mode and your luminance data are separate from your color data. Go ahead with global changes such as sharpening, noise reduction, local contrast and color and tone adjustments, but I’d stay away from dodging and burning in particular. At least in the version I have, there’s no undo feature, so an erroneous burn can wipe out what you’ve done, just like in a wet darkroom!
  7. You’ve now done pretty much all you can do in 32-bit mode, so set Upon Apply Convert To to 16 bpc. This will return a 16-bit image back to PS and change PS to 16-bit RGB mode. It’s also better to change to 16-bit mode while you’re still in 32 Float since there can be some rather quirky artifacts when the 32-to-16 bit conversion is done within PS.
  8. Back in PS, decide whether you want to merge in any of the original exposures. I will often do this in cases where there are ghosts such as people in different positions or if there are artifacts, details, tones or colors that are much better in one of the original images than in the merged one. If so, go back to LR, select the original RAW images and click on PhotoEdit In…Open as Layers in Photoshop… Back in PS, select the merged image then use Layer…Duplicate Layer to copy it as the top layer in the RAW-image stack. Use layer masking and other tools to manually combine your  originals and the merged image.
  9. Further tweak the combined image as necessary. If you need a filter that’s only available in 8-bit RGB mode such as Pixel Bender, Distort or the Topaz Labs suite, change the Mode to 8-bit RGB, but do so as late as possible. Otherwise keep the image in 16-bit mode.
  10. Click Save, which returns the image to LR.
  11. In LR do your cropping, final sharpening, noise reduction and vignetting.

Workflow #2: HDR Expose (without Photoshop)

This variation is designed for those who either don’t have PS or just prefer to do all their retouching in LR.

  1. Don’t make any adjustments in LR’s Develop module. The one exception might be if you need to correct for severe chromatic aberration, which is quite difficult to do later in the workflow.
  2. Select the bracketed RAW files in LR then select File…Export…Merge and Edit in HDR Expose. This uses HDR Expose’s alignment and merge engines instead of PS’s. Important: Make sure you select Merge and Edit Original Image(s) in the Export dialog box. This will send your RAW files directly to HDR Expose. If you select Merge and Edit Images with Lightroom Adjustment(s) you will be sending LDR 16-bit TIFF files and thereby throwing away a lot of important data. The only time to use this option is if you corrected chromatic aberration in step #1. It’s a tradeoff. [There’s a workaround for this tradeoff: You can make adjustments in LR’s Develop module. (I’d suggest limiting them to lens correction and camera calibration.) Then Export your set of bracketed RAW images as DNG files. This retains their full 32-bit range. You can then start HDR Expose as a standalone application and merge the saved DNG files.]
  3. Tonemap and adjust the image in HDR Expose.
  4. Click OK and save the image as a 16-bit TIFF. It will be returned to LR.
  5. You have the option at this stage to perform additional processing on the merged LDR image in PS. Use Edit in…Photoshop CS5 to export to PS. When you’re done, Save will return the results to LR.
  6. Crop, sharpen, reduce noise and vignette in LR.
  7. Continue with step 8 in Workflow #1.
Workflow #3: LR/Enfuse

Before a friend told me about HDR Expose and 32 Float, this was my first choice for HDR merging and tonemapping. Not only is it free (donationware, actually) it’s also fast and simple and produces a fairly linear tonemapped image ready for additional adjustment. LR/Enfuse is the open-source Enfuse command-line utility packaged as a LR plugin.

  1. Select your bracketed RAW images in LR.
  2. In the LR menu, select File…Plug-in Extras…Blend exposures using LR/Enfuse…
  3. In the Output tab select 16-bit ProPhoto TIFF and Reimport image into Lightroom.
  4. LR/Enfuse will perform the HDR merge and tonemapping. Although you can make some adjustments before it runs, there’s no interactive preview.

The tonemapping in 32 Float, HDR Expose and LR/Enfuse generally give me the most realistic results. But occasionally I want a less-realistic look, in which case I typically turn to Photomatix Pro. There are three different ways to use this utility, depending on the balance you want to strike between simplicity/speed and quality/control.

Workflow #4: Photomatix Tone Mapping Plugin for Photoshop

This plugin is sold separately by HDRsoft. It’s the best way to use Photomatix Pro with PS.

  1. Follow steps 1-4 in Workflow #1.
  2. Launch the Photomatix plugin by selecting Filter…Photomatix…Tone Mapping…
  3. In Photomatix tonemap the HDR image to LDR and make other adjustments. I tend to use default settings here, waiting until I return to PS to make further changes.
  4. Click OK, which returns a 32-bit HDR image to PS.
  5. Don’t worry if the LDR preview of the 32-bit HDR image looks all wrong in PS. Click on Image…Mode…16-Bits/Channel.
  6. If you want the double-tonemapping look, you can make further tweaks in this second HDR Toning step.
  7. Continue with step 8 in Workflow #1.
Workflow #5: Photomatix Pro (with Photoshop but without the Plugin)

If you want to work with PS but don’t want to buy the Photomatix Tone Mapping Plugin for Photoshop, this variation works fine. It’s just a little more complex.

  1. Follow steps 1-4 in Workflow #1.
  2. Save the HDR image as a Radiance (.hdr) file in a temporary location. (You don’t need to keep this for archival purposes since it is easily reproduced from the RAW images at any time.)
  3. Start Photomatix Pro and open the .hdr file.
  4. Use tonemapping and other adjustments to create an LDR image from the HDR image.
  5. Save the LDR file as a 16-bit TIFF and Import (Copy) it into LR. Use a filename that will place it near your originals in the LR grid view.
  6. If you need to make PS adjustments, use Edit In…Photoshop CS5, and return the results to LR as another LDR 16-bit TIFF.
  7. Continue with step 8 in Workflow #1.

Workflow #6: Photomatix Pro (without Photoshop)

This workflow bypasses PS altogether, moving images from LR directly to/from Photomatix Pro. This process is fine for some HDR images, but it has certain weaknesses. First, it depends on Photomatix Pro to perform the HDR merge and image alignment — functions performed better by PS.

  1. Select the bracketed RAW files in LR then select File…Export…Photomatix Pro. But make sure you change the File Settings in the Export One File dialog box to DNG. If you don’t do this, you’ll be sending LDR images to Photomatix Pro and therefore losing highlight and shadow detail. (For an in-depth explanation, see Are You Wasting Dynamic Range?)
  2. Photomatix Pro will merge the DNG (RAW) files into an HDR image.
  3. In Photomatix Pro use tonemapping and other adjustments to create an LDR image from the HDR image.
  4. Click on Save and Re-Import and Photomatix Pro will return a 16-bit TIFF to LR.
Workflow #7: HDR Efex Pro

Nik Software’s HDR Efex Pro is the new kid on the block. While I like Nik’s control-point UI and have settled on their Silver Efex Pro as the #1 plugin for monochrome, HDR Efex Pro has become a tool I don’t use much any more. But many people use it, so I’ve included it in my workflows.

  1. Follow steps 1-4 in Workflow #1.
  2. In PS select Filter…Nik Software…HDR Efex Pro. 
  3. After tonemapping and possibly making other adjustments in HDR Efex Pro click OK, which returns a 16-bit LDR image to PS.
  4. Continue with step 8 in Workflow #1.
Single-Image HDR

When your source is just a single RAW file, there’s no need for the Merge to HDR Pro step. In fact, you can’t run Merge to HDR Pro with just one image. In this case you need to get your RAW file to your tonemapping utility as directly as possible. Starting in LR, use one of these tools, ranked in order of my personal preference:

  • LR/Enfuse: Because it’s simple, this is a workflow I sometimes use for single-image HDR. Just follow the same steps described for Workflow #3.
  • Photomatix Pro: You can’t send a single RAW image through PS to the Photomatix Tone Mapping Plugin, but you can export a single RAW image directly to Photomatix Pro, which automatically returns the resulting image to LR. Use File…Export…Photomatix Pro, but make sure you change the File Settings in the Export One File dialog box to DNG as described in Workflow #6 for multiple source images using Photomatix Pro.
  • HDR Expose: This workflow is more cumbersome than using LR/Enfuse or Photomatix Pro, but it’s the process I use for single-image HDR if I’m not satisfied with the results from the simpler tools. HDR Expose is the standalone version of 32 Float, and it can open one or more RAW files directly. Unfortunately it can’t deal with a single image exported from LR, so you need to start HDR Expose and open the file from there. This means you’ll have to save the output of HDR Expose as a file (typically a 16-bit TIFF) then import that back into LR.
  • 32 Float: Because PS’s Merge to HDR Pro won’t accept a single RAW image, the only way to get the full dynamic range of a single RAW image into PS is via the extended-EV TIFF method, described below.
  • HDR Efex Pro: This application does not include a RAW file processor. The only way I know to preserve the full dynamic range of a single RAW file for HDR Efex Pro is to use the extended-EV TIFF method.
The Extended-EV TIFF Method

This is a method for recovering data from RAW files when the tools you’re using cannot read those RAW files directly. It is not required or recommended for any of the multi-image workflows above. The only time I use it is when I want to process a single RAW file using 32 Float or HDR Efex Pro, which is now pretty much never. You’re probably better off just using another tool such as LR/Enfuse, Photomatix Pro or  HDR Expose, but if you don’t have one of those applications or plugins, the following is your best choice.

I first learned this technique from Klaus Herrmann in the section in his online HDR Cookbook entitled Creating HDR Images the Right Way. (Look for the Five TIFFs method.) A RAW file can contain image data from the darkest shadow detail to the brightest highlights, spanning a range of 10EV-12EV. But an LDR file such as a 16-bit TIFF can only represent 6EV-8EV. The idea of the extended-EV TIFF method is to replicate the wide dynamic range of data found in a RAW/HDR image using a bracketed set of LDR TIFFs from that image. Each TIFF file will contain the data from a different (but overlapping) portion of the RAW image’s brightness range.

  1. Open the RAW image in a RAW file processor application such as Lightroom, Adobe Camera Raw (Photoshop), Phase One’s Capture One Pro, Nikon’Capture NX2, etc.
  2. Using the app’s Exposure slider or equivalent, reduce the luminosity by 4EV.
  3. Save the image as a 16-bit TIFF, preferably in the ProPhoto RGB colorspace, with a filename that both identifies the original image as well as the adjusted EV. Something like “IMG1234_-4ev”.
  4. Repeat the previous two steps so you end up with five TIFFs, one each with exposure adjustments of -4EV, -2EV, 0EV, +2EV and +4EV.
  5. Check the +2EV and +4EV images and decide if they should be included in the set. While the -4EV and -2EV are very likely to include extra highlight data that appears blown out in the 0EV image, the same is often not true for shadow recovery. If the +2EV and +4EV images don’t contain true shadow detail that doesn’t appear in the next-lower-EV image, don’t use them — they won’t add detail to the shadows, but they will increase the noise.
  6. Treat these three, four or five images as bracketed originals and submit them as input to your HDR merge application such as HDR Pro (Photoshop), HDR Expose, Photomatix Pro and HDR Efex Pro. You can see the results of my tests of this method at HDR Tools Comparison.

If you’re working with multiple bracketed RAW originals and you’re still getting blown-out highlights when tonemapping, you may be able to recover them using a variation of the extended-EV TIFF method:

  1. Create a 16-bit ProPhoto RGB TIFF with no exposure adjustment from each RAW original.
  2. From the darkest (lowest-EV) RAW image, create two additional TIFF files: one darkened an extra -2EV and another at -4EV.
  3. If you started with three RAW images, for example, you’ll now have five TIFFs.
  4. Use these TIFFs instead of the RAW files as the source images for your HDR merge process.
  5. As with the single-RAW image variation, you can also try +2EV and +4EV TIFFs made from the brightest RAW image, but again to avoid noise don’t use them unless they provide details in the shadows that don’t already appear in a lower-EV image.

[Please post all comments questions on this Google+ page since there are far more photographers there than are reading this blog.]

Aligning Images for HDR

This is the fifth in a series of articles abut passing images between Lightroom, Photoshop and various plugins:

One step in the process of creating an HDR image is the alignment of the bracketed originals. If you’re working with a single RAW image (possibly extracting extended highlight or shadow detail using Klaus Hermann’s Five TIFFs method) this isn’t a problem as you’ll only have one image or the pixels in your extra images will be perfectly registered. If you’re using multiple exposures and a tripod, you won’t have perfectly aligned pixels, but they’ll be close. However, if you’re shooting bracketed exposures handheld, aligning your source images presents an interesting software challenge.

For this article is used two bracketed images (to keep things simple) that were shot handheld. The images below show how well four different applications were able to align the images.

  • Photomatrix Pro (upper left) doesn’t appear to have a particularly good alignment algorithm, although we might be seeing some other artifact of that apps’ processing. It’s hard to tell
  • LR/Enfuse (upper right) does such a bad job of aligning the two images (using default settings) the offset is almost the entire width of these 200% scale images.
  • NIK’s HDR Efex Pro (lower right) looks a little better than Photomatix Pro but still not as good as Photoshop (next).
  • From Lightroom, Merge to HDR Pro in Photoshop CS5 (lower left) appears to do the best job of aligning the images.


But while Photoshop may be the best tool for aligning images, we also know that it’s one of the weakest HDR applications for other reasons. How then can we take advantage of Photoshop’s alignment feature while using one of the other superior HDR apps?

For my more critical HDR images, my workflow now includes the following steps:

  • Select all the images (including any extended-EV TIFFs) in Lightroom.
  • In the Lightroom menu: Photo > Edit in > Open as Layers in Photoshop…
  • In Photoshop, select all layers.
  • From the Photoshop menu: Edit > Auto-Align Layers > Auto.
  • Crop the image (all layers) to eliminate areas that aren’t present in all layers.
  • Save each layer as a 16-bit ProPhoto RGB TIFF.
  • Use these derivative TIFFs as the input to my HDR application of choice.

To see the results of this portion of the workflow, consider the following images, each produced in this way.

  • Photomatix Pro (upper left) has been improved somewhat.
  • LR/Enfuse (upper right) has gone from worst to best.
  • HDR Efex Pro (lower left) has also improved a bit.

This portion of my workflow is fairly time consuming and I don’t use it all the time. But when I have an HDR image that’s critical, particularly when it was shot handheld or if I’m trying to achieve a particularly realistic (non-HDR-ish) look, this is what I do. And increasingly I’m using LR/Enfuse as my HDR tool of choice.


[Please use Google+ for comments: http://goo.gl/Retbw]

HDR Tools Comparison

[Update 1/15/12: Added tests for Unified Color’s HDR Expose 2]

This is the fourth in a series of articles abut passing images between Lightroom, Photoshop and various plugins. The other posts include:

For this installment I ran a very simple test of five different tools for merging bracketed images. I started with a single RAW image — see the previous article — then created three 16-bit ProPhoto RGB TIFF files (0EV, -2EV, 2EV). I fed these TIFFs into the applications then generated the JPEGs below using the apps’ default settings.


It’s important to remember that this test was performed with just one class of image. As you use images with different parameters (or take advantage of the various adjustments available within each app) your mileage may vary greatly. For example, LR/Enfuse offers relatively few parametric options and it’s not an interactive program, whereas the other three are WYSIWYG apps.

However there are a few observations that I see consistently. First, Nik’s HDR Efex Pro and Adobe Photoshop’s HDR Pro are generally inferior to the other two applications. Second, LR/Enfuse and Photomatix Pro are remarkably similar other than the latter’s obvious color shift, which is easily correctible. HDR Expose looks equally as good although the default settings appear to over-saturate some portions of the image. Because it’s quite fast and simple, I find I use LR/Enfuse more and more, particularly when my goal is to create a realistic (rather than stylized, grungy, etc.) final image. LR/Enfuse is inexpensive donationware based on the open-source Enfuse application. [I learned about HDR Expose after this article was originally posted. I have not evaluated it other than to perform these tests, but my initial impression is that it’s quite good at least as for as these tests are concerned.]

[Please use Google+ for comments: http://goo.gl/d45YK]

RAW File Processing: Photomatix Pro vs. ACR/Lightroom

[Update 1/15/12: Added tests for Unified Color’s HDR Expose 2]

This is the third in a series of articles abut passing images between Lightroom, Photoshop and various plugins. The other posts include:

In this post I’ll examine the best way to get RAW files into Photomatix Pro. We’ll look at three methods: (1) using the default Lightroom method of exporting an image to Photomatix Pro; (2) opening RAW files directly in Photomatix Pro (and using Photomatix Pro’s RAW file converter); and (3) exporting bracketed TIFF files from Lightroom and then opening these files in Photomatix Pro (ie, using Lightroom’s RAW file converter, essentially that of Adobe Camera Raw or ACR).

We’re only trying to evaluate these workflows and the quality of the two different RAW converters, so to keep things simple we’ll start with a single RAW file. The first/left image below is a low-dynamic range (LDR) JPEG exported from that RAW image in Lightroom with no corrections or adjustments. It’s generally overexposed, but there are substantial areas that appear entirely blown out. However, because the original is a RAW image, we can possibly recover some detail from those highlights that don’t appear in a 0EV LDR JPEG.


The second image was made by selecting Plug-in Extras…Export to Photomatix Pro… in Lightroom. This creates a single TIFF image which is then opened by Photomatix Pro. I used Photomatix Pro’s default settings and returned a 16-bit sRGB TIFF to Lightroom, which I then exported as the JPEG above. There is virtually no recovery of any burned-out highlights in the resulting image.

The third image is the result of opening the original RAW file directly in Photomatix Pro, using its default processing, saving the results as a 16-bit sRGB TIFF from which the above JPEG was made. You can see that some of the details in the blown-out areas have been recovered.

I then used the technique which I recommend in order to save/recover as much dynamic range as possible when working with Lightroom and Photomatix Pro to create the image below.

The steps to create the above image are a bit more complex that the other workflows. The first step was to export three different 16-bit ProPhoto TIFF files from Lightroom. All three were from the same original RAW file as was used for the first two images, but the Exposure slider in Lightroom’s Develop module was set to 0.00, -2.00 and -4.00 respectively. I then opened all three TIFFs in Photomatix Pro as a set of bracketed originals. As you can see, this process recovered far more detail in what at first appeared to be the blown-out areas. (Don’t worry about what appears to be a shift in color. This is a separate issue and is easily resolved.)

These tests support the general understanding of many experienced HDR photographers that the Lightroom/ACR RAW file processor is dramatically superior to the one built into Photomatix Pro and that Lightroom’s Export to Photomatix Pro should be avoided in all cases. To take advantage of this workflow in realistic situations (eg, when you have bracketed originals instead of just one) I recommend following Klaus Hermann’s Five TIFFs method.

Update: Based on a friend’s suggestion, I decided to compare Unified Color’s HDR Expose to Photomatix Pro. Below are two images from HDR Expose. The first was made using the application’s own RAW processor. The second was made from the same three bracketed TIFFs as used for the last Photomatix Pro test.

If you ignore the differences in saturation, which are fairly easily corrected, these two images are quite similar to one another and to the three-TIFF Photomatix Pro output. When you consider that the left image was made without the hassle of first exporting three different TIFF variations, it appears that HDR Expose would be a better choice for this test case. This is even more so when you further consider that the left image above requires less color hue and saturation correction.

[Please use my Google+ page for comments. There are a lot more photographers there!]

The Lightroom “Edit in…” Problem

This is the second in a series of articles abut passing images between Lightroom, Photoshop and various plugins. The other posts include:

[See Update at the end of the post. 4:20pm PST on 1/10/12.]

Yesterday I posted the first in this series of articles (Are You Wasting Dynamic Range?) about problems passing images between Lightroom and Photoshop, plugins, etc. Today I want to look at just one such situation, the use of the Edit in… menu option in Lightroom 3. An hour ago I saw the announcement of Lightroom 4 beta. I wonder if this is something Adobe would consider fixing for version 4.

The Challenge

We start with the image below of the Golden Gate Bridge at night. Not only is the image generally overexposed, the highlights are completely blown out. Can we rescue this image? It’s easy to darken it overall, but what about those highlights?

Luckily it was shot in RAW so there’s a lot of data in the highlights and (to a lesser extent) the shadows that we can’t see in this uncorrected version. Just to be clear, what you see below is not a RAW image. There’s no way to display a RAW image in a browser or on your screen. The dynamic range of the image is just too great. Instead, what you see here is a JPEG derived from the RAW file using the default Lightroom settings. [Note: You can click on any image to see a larger version.]

Uncorrected

Correcting in Lightroom’s Develop Module

Below is an example of what we can do in Lightroom (or pretty much any other RAW file processing application) to recover the highlights and reduce the overall exposure. (For the curious, the settings are Exposure=-2.55, Recovery=65.) Additional corrections could certainly be made, but this illustrates what we’re trying to show. We’ve recovered a lot of detail in the highlights in both the moon’s reflection on the water and the city lights in the distance.

Corrected in Lightroom

Passing the Image to Photoshop

Now suppose you use Lightroom to organize your images, but you want to make your corrections in Photoshop rather than in Lightroom’s Develop module. Select Edit in…Photoshop CS5 from the Photo menu or right/ctrl-click on the image in the grid. Photoshop starts up and shows you pretty much the same thing as the first image at the top of this post.

But if you now try to recover the highlights, the image below is pretty much the best you can get. (Exposure adjustment layer with Exposure=0.38, Gamma Correction=0.37.)

Edit in...Photoshop CS5 and Corrected There

This looks a little better than the original, but not as good as the image corrected in Lightroom. Why? It’s because of how Lightroom passed the image to Photoshop. Rather than passing the original RAW file with all it’s wide-ranging data, Lightroom created a TIFF file, which is inherently low-dynamic range) and passed that to Photoshop instead.

From the Lightroom…Preferences…External Editing menu you can select the format and colorspace of the intermediate images passed to Photoshop, but a 16-bit TIFF using the ProPhoto RGB colorspace is the best option available. You cannot pass a DNG or other RAW-file image with high dynamic range.

What to Do?

Does this really make a difference to you? It all depends on whether you need to recover highlight or shadow details in your images. If not, then go ahead and use the Edit in…Photoshop CS5 feature. But if you want to recover any such data, there are two choices. First, you can do your recovery using the Lightroom Develop module and then Edit in…Photoshop CS5, in which case your corrections will be baked into the intermediate image. Alternatively, you can open the original RAW file in Adobe Camera RAW (ACR) or in Adobe Bridge, which will start ACR for you. This will allow you to make the same corrections as you can in Lightroom’s Develop module since it uses the same RAW file processor engine as ACR.

And if you shoot in JPEG instead of RAW, you don’t have to worry about any of this. Those highlights are burned out and gone for good. There is nothing to recover from a JPEG, which is already an LDR image. You can go from high-dynamic range (HDR) to LDR, but there’s no poing in going the other direction. Once you’re in the LDR world, the extended data is forever lost.

Edit in…(something else)

What about all those other options under the Edit in… menu? If you have some plugins installed, you might see them listed there. Passing an LDR intermediate image to these plugins is the only option. Therefore, if you want to recover highlights or shadows, you must do that in the Lightroom Develop module before invoking the plugin. My suggestion is that you also perform certain other Develop-module tasks before invoking the plugins such as Lens Correction — the plugin may delete the lens’ EXIF data — and preliminary sharpening and noise reduction.

[If you have any comments or questions related to this post, please make them on my Google+ page. There are a lot more photographers reading g+ than reading my blog!]

Update!

I’ve discussed this issue and my idea that Edit in… might support DNG intermediates in LR4 with Eric Chan, one of Adobe’s ACR gurus on the Adobe Labs Forum. Eric made a good case for why this might not be an appropriate feature. You can read the discussion here.

But over on Google+, Marko Haatanen provided a solution. In LR you can Photo…Edit in…Open as SmartObject in Photoshop… It won’t appear as though you’ve successfully moved the RAW file into PhotoShop, but if you double-click on the SmartObject in the Layers panel Photoshop will open the image in ACR. And if you’ve previously made adjustments in Lightroom’s Develop module, you’ll see them there, slider-for-slider. (Remember LR’s Develop module is virtually the same as ACR.) Very cool.

If you select two or more images in LR and go for Photo…Edit in…Open as SmartObject in Photoshop…, you’ll get the same number of images in Photoshop. But if your goals are either HDR or you just want to mask-in selections from multiple selections, what you really want is a single image with a SmartObject layer for each original. Again on Google+, Tarun Bhushan showed me how to do this. “In PS, click on a Smart Object layer in one open document and use Duplicate Layer. In the dialog that comes up, choose the destination document as the one where you want the Smart Object to be as a layer. Now you will have the two Smart Objects as layers in one document that you can then manipulate independently.”

I’ll have more to say about this as I continue to explore some of the best options for HDR in particular.

Are You Wasting Dynamic Range?

[Update 1/15/12: Added tests for Unified Color’s HDR Expose 2]

This is the first in a series of articles abut passing images between Lightroom, Photoshop and various plugins. The other posts include:

The other night at the meeting of our local photo club’s HDR Special Interest Group, we began a discussion about the preservation of the full dynamic range of RAW images when you use plugins, exports and scripts in Lightroom and Photoshop. I made the statement that, for example, when you Export from Lightroom to Photomatix Pro, the default is to pass the source images as TIFF files, which inherently reduces the dynamic range and looses data. A few people challenged that assertion, so I’ve set out to research it in some detail. This post represents the first round of my test results.

Note that this discussion does not apply only to HDR. The principles apply equally to exporting any RAW images to Photoshop or any plugin. [Spoiler: I’m going to demonstrate why you should use Adobe’s Digital Negative (DNG) file format when exporting images to Photoshop or Photomatix Pro.]

Buzzword Backgrounder

Let’s make sure we understand the classes of image-file formats. Only the RAW file formats (.NEF, .DNG, .CR2, etc.) can preserve the full dynamic range of data captured from your camera’s sensor. Once you convert to any other format (.TIFF, .JPEG, etc.) you will lose dynamic range. It doesn’t matter what colorspace you use (sRGB, Adobe RGB, ProPhoto). It doesn’t matter whether you use 8- or 16-bit encoding. And it doesn’t matter whether you select compressed or uncompressed options. All file formats other than RAW (or true HDR, which is rarely used) are designed for viewing or printing and are therefore inherently low dynamic range (LDR) to match the LDR-only capabilities of our displays and printers. If you add bit depth (switching from 8-bit to 16-bit) you’re just increasing the number of colors that can be represented and therefore minimizing banding. You are not significantly increasing the dynamic range of what can be represented.

RAW, HDR and LDR

It’s also important to understand that we don’t have the tools (hardware or software) to view the full dynamic range of a RAW or HDR image. Even if you shoot in RAW format, the image you see on your camera’s display is an LDR derivative. If you open your RAW images in Lightroom or Adobe Camera RAW (ACR), you’re again looking at an LDR derivative. And when you merge images in Nik’s HDR Efex Pro, HDRSoft’s Photomatix Pro and Unified Color’s HDR Expose the output is an LDR image. (We often look at an image and say, “It’s an HDR” or “It looks like HDR.” In fact, these are LDR images created from one or more originals or HDR intermediates. The data are only truly HDR while you’re within the HDR apps.)

The RAW File Converters

There’s a class of applications called “RAW file converters” which includes Lightroom, ACR, Phase One’s Capture One Pro, Nikon’s Capture NX2, etc. These apps have one goal: to create an LDR image from a RAW file. In doing so, the dynamic rage of the image will necessarily be reduced and data will be lost. The adjustments (sliders, curves, etc.) within these apps allow you to decide which data are removed and which are preserved, but “preserve all” is not an option. You have to lose something in order to create an image that can be viewed or printed. (Note that Photoshop cannot directly process a RAW image. If you try, Photoshop will first launch ACR and require you to create an LDR image that is then passed into Photoshop.)

The images below help to explain this point. I started with a RAW file that’s just one of a bracketed set. This is the -4EV (ie, most underexposed) of the set of five. I loaded this RAW file into Lightroom and then created the two images shown below. [Click on any image in this post to see a higher-resolution version.]


Yes, both of the above JPEG (ie, LDR) images were created from the same RAW file original. The left one used the default settings in Lightroom’s Develop module. For the right, I used Exposure=+4.00, Fill=70, Recovery=100 and Brightness=0. I could have used Adobe Camera Raw (ACR) instead of Lightroom and achieved the same results because the RAW processing engine of both apps are identical. Note that in order to bring out the detail in the shadows, I had to compromise and let the highlights burn out.

Using LDR file formats it takes multiple images to represent the full dynamic range of even one RAW image. You can’t squeeze all this information into a single TIFF or JPEG even by just reducing the contrast. If you try, you’ll lose too much tonal distinction. That is, levels of brightness will clump together and you’ll end up with tonal banding.

As you can see, there’s a lot more information in the shadows of the original RAW image than you might think if you only saw the first image. The goal I want to explore is how to ensure that all of that information is available within Photoshop or the various plugins and HDR applications.

Some popular HDR tools such as HDRSoft’s Photomatix Pro also can accept and fully exploit RAW images, but if you pass those RAW images to these applications from Photoshop, Lightroom, etc., you may unknowingly be first converting your RAW files into an LDR format and throwing away substantial detail that you cannot ever recover. Lightroom’s export to Unified Color’s HDR Expose is unique in that the default is to pass the full RAW image to the plugin. Because NIK’s HDR Efex Pro apparently cannot process RAW files directly, this is exactly what will happen if you use that plugin.

Exporting from Lightroom

What happens instead if you export the RAW image from Lightroom to Photoshop using the default settings (16-bit Adobe RGB TIFF). This is what you’ll see. It looks pretty much like the default JPEG from Lightroom.

But suppose you then want to use Photoshop to recover that shadow detail? The image below shows what happens when you add an Exposure adjustment layer.

It’s clear that some detail in the dark areas can be recovered, but the image is very contrasty and saturated and the highlights are now even more blown out. Certainly a lot of information has been lost by using a 16-bit TIFF as an intermediate format.

Could the problem be with the choice of the colorspace in the intermediate TIFF image? The images below were created in the same manner as the above image except that I used the sRGB (left) and ProPhoto (right) colorspaces.


None of these images comes close to the JPEG I was able to create directly from Lightroom. Specifically, none of the images made using an intermediate TIFF and Photoshop were as good in recovering shadow details. (Check the area under the statues at the very center/bottom of the image.)

Using DNG as an Intermediate Format

If you want to export images from Lightroom to Photoshop, how can you avoid this loss of data? The simplest solution I know of is to use Adobe’s DNG format for intermediate files. The image below shows that result. When Photoshop opens the DNG, it first launches Adobe Camera RAW (ACR). This gives you the opportunity to extract the extended-range data before creating the LDR image used in Photoshop.

As you can see, this is quite similar to the JPEG created directly in Lightroom. Again, that’s because Lightroom’s Develop module is based on ACR. Like Lightroom, ACR is also a RAW-file converter, which means it generates an LDR image from a RAW file. It’s that LDR image that is passed to Photoshop when you Open a RAW file from ACR. And as with Lightroom, that means there’s the potential for losing even more data.

Exporting for HDR Processing

If DNG is the best intermediate format between Lightroom and Photoshop, what about getting images into our HDR tools such as Photomatix Pro and HDR Efex Pro?

Starting with the same single unmodified RAW file in Lightroom, I ran an Export to Photomatix Pro. Here’s the result using Photomatix Pro’s default settings and three different intermediate options: (1) 16-bit Adobe RGB TIFF (Lightroom’s default); (2) 16-bit ProPhoto RGB TIFF; and (3) DNG.


The DNG version is again quite superior to the TIFFs.

What about exports from Lightroom to HDR Efex Pro Pro? The images below were exported from Lightroom to HDR Efex Pro using: (1) 16-bit Adobe RGB TIFF; and (2) 16-bit ProPhoto RGB TIFF. I had to use some rather extreme settings in HDR Efex Pro to make the images look even this good: Exposure=+1.7EV, Contrast=+25%, Saturation=-45%, Blacks=+85%. As far as I can tell, there is no way to pass an image from Lightroom to HDR Efex Pro as a DNG or other type of RAW file.


And what about the newcomer, Unified Color’s HDR Expose 2? The default export to this plugin apparently passes the RAW file, and the RAW converter is quite good. The image below is the result of the default export from a single RAW image to HDR Expose 2.

Conclusions

I’m going to run a few more tests. In particular, I want to demonstrate how it is possible to use extended-EV TIFF files created from RAW files as intermediates. I first learned this technique from Klaus Herrmann in the section in his excellent online HDR Cookbook entitled Creating HDR Images the Right Way. (Look for the Five TIFFs method.) I also want to get some feedback from other photographers who have studied this. I expect I’ll have to make a few corrections to this post even as far as I’ve gotten so far.

It seems DNG is the best format for a simple export from Lightroom to Photoshop or Photomatix. Unfortunately, HDR Efex Pro doesn’t support this. For that application, you should use Klaus’ Five TIFF method, which is a lot more time consuming. If you’re using HDR Expose, you don’t have to worry — the default work well. More to come.

[See also the next post in this series: The “Edit in…” Problem in Lightroom.]

Autofocus Calibration

I only brought one lens to the #MarinPhotowalk on Sunday: a Nikkor 135mm f/2 AF DC, which I bought used a few weeks ago. I shot everything wide open at f/2. But when I uploaded the images, it seemed as though every one of them was a little soft. In fact, the in-focus point was just a bit farther than where I intended, usually someone’s closest eye.

So today I dragged out my MTP LensAlign and checked that lens on my D700, which I also bought used about a year ago. Sure enough the tests were back-focused about 1/2″ at f/2 and a distance of six feet. That may not sound like much, but with that configuration the depth-of-field is only +/-0.36″.

I assumed the problem was just for my 135mm f/2 lens, but no. It’s off the same amount for all my lenses. The good news is (a) it’s adjustable in my D700, and (b) instead of changing it for each lens, there’s a Default setting that applies to all lenses. The range of correction is +/-20. (I don’t know what the units represent.) It took -13 to get it right.

I mentioned this to Scott Loftesness, who wasn’t aware that you can also do this on a Canon 5DMkII. I know it’s also adjustable on my cropped-sensor Nikon D7000.

The Lens Align MkII is way overpriced at $79.95, but it does work quite well. I haven’t seen discount prices anywhere. I recommend borrowing one if you can. BorrowLenses.com rents the Pro version for only $11 for three days. The difference among the models is relatively insignificant.

I previously bought the Spyder LensCal which is a few dollars cheaper, but I sent it back to Amazon because the construction quality was so poor.