Aligning Images for HDR

This is the fifth in a series of articles abut passing images between Lightroom, Photoshop and various plugins:

One step in the process of creating an HDR image is the alignment of the bracketed originals. If you’re working with a single RAW image (possibly extracting extended highlight or shadow detail using Klaus Hermann’s Five TIFFs method) this isn’t a problem as you’ll only have one image or the pixels in your extra images will be perfectly registered. If you’re using multiple exposures and a tripod, you won’t have perfectly aligned pixels, but they’ll be close. However, if you’re shooting bracketed exposures handheld, aligning your source images presents an interesting software challenge.

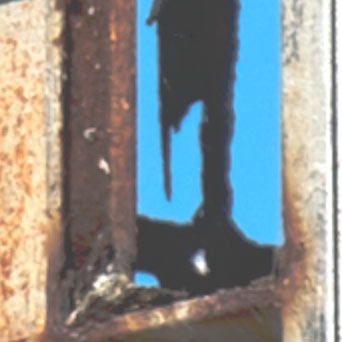
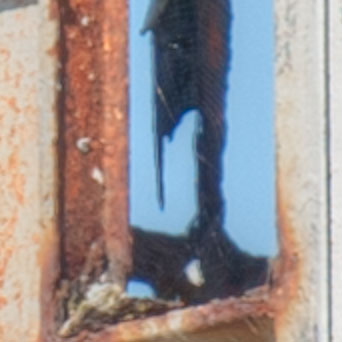
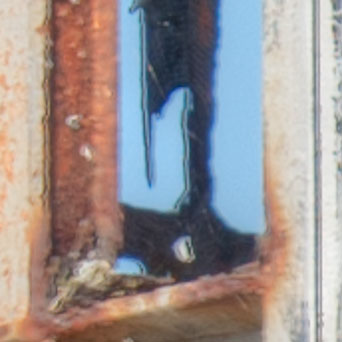
For this article is used two bracketed images (to keep things simple) that were shot handheld. The images below show how well four different applications were able to align the images.

  • Photomatrix Pro (upper left) doesn’t appear to have a particularly good alignment algorithm, although we might be seeing some other artifact of that apps’ processing. It’s hard to tell
  • LR/Enfuse (upper right) does such a bad job of aligning the two images (using default settings) the offset is almost the entire width of these 200% scale images.
  • NIK’s HDR Efex Pro (lower right) looks a little better than Photomatix Pro but still not as good as Photoshop (next).
  • From Lightroom, Merge to HDR Pro in Photoshop CS5 (lower left) appears to do the best job of aligning the images.


But while Photoshop may be the best tool for aligning images, we also know that it’s one of the weakest HDR applications for other reasons. How then can we take advantage of Photoshop’s alignment feature while using one of the other superior HDR apps?

For my more critical HDR images, my workflow now includes the following steps:

  • Select all the images (including any extended-EV TIFFs) in Lightroom.
  • In the Lightroom menu: Photo > Edit in > Open as Layers in Photoshop…
  • In Photoshop, select all layers.
  • From the Photoshop menu: Edit > Auto-Align Layers > Auto.
  • Crop the image (all layers) to eliminate areas that aren’t present in all layers.
  • Save each layer as a 16-bit ProPhoto RGB TIFF.
  • Use these derivative TIFFs as the input to my HDR application of choice.

To see the results of this portion of the workflow, consider the following images, each produced in this way.

  • Photomatix Pro (upper left) has been improved somewhat.
  • LR/Enfuse (upper right) has gone from worst to best.
  • HDR Efex Pro (lower left) has also improved a bit.

This portion of my workflow is fairly time consuming and I don’t use it all the time. But when I have an HDR image that’s critical, particularly when it was shot handheld or if I’m trying to achieve a particularly realistic (non-HDR-ish) look, this is what I do. And increasingly I’m using LR/Enfuse as my HDR tool of choice.


[Please use Google+ for comments: http://goo.gl/Retbw]

HDR Tools Comparison

[Update 1/15/12: Added tests for Unified Color’s HDR Expose 2]

This is the fourth in a series of articles abut passing images between Lightroom, Photoshop and various plugins. The other posts include:

For this installment I ran a very simple test of five different tools for merging bracketed images. I started with a single RAW image — see the previous article — then created three 16-bit ProPhoto RGB TIFF files (0EV, -2EV, 2EV). I fed these TIFFs into the applications then generated the JPEGs below using the apps’ default settings.


It’s important to remember that this test was performed with just one class of image. As you use images with different parameters (or take advantage of the various adjustments available within each app) your mileage may vary greatly. For example, LR/Enfuse offers relatively few parametric options and it’s not an interactive program, whereas the other three are WYSIWYG apps.

However there are a few observations that I see consistently. First, Nik’s HDR Efex Pro and Adobe Photoshop’s HDR Pro are generally inferior to the other two applications. Second, LR/Enfuse and Photomatix Pro are remarkably similar other than the latter’s obvious color shift, which is easily correctible. HDR Expose looks equally as good although the default settings appear to over-saturate some portions of the image. Because it’s quite fast and simple, I find I use LR/Enfuse more and more, particularly when my goal is to create a realistic (rather than stylized, grungy, etc.) final image. LR/Enfuse is inexpensive donationware based on the open-source Enfuse application. [I learned about HDR Expose after this article was originally posted. I have not evaluated it other than to perform these tests, but my initial impression is that it’s quite good at least as for as these tests are concerned.]

[Please use Google+ for comments: http://goo.gl/d45YK]

RAW File Processing: Photomatix Pro vs. ACR/Lightroom

[Update 1/15/12: Added tests for Unified Color’s HDR Expose 2]

This is the third in a series of articles abut passing images between Lightroom, Photoshop and various plugins. The other posts include:

In this post I’ll examine the best way to get RAW files into Photomatix Pro. We’ll look at three methods: (1) using the default Lightroom method of exporting an image to Photomatix Pro; (2) opening RAW files directly in Photomatix Pro (and using Photomatix Pro’s RAW file converter); and (3) exporting bracketed TIFF files from Lightroom and then opening these files in Photomatix Pro (ie, using Lightroom’s RAW file converter, essentially that of Adobe Camera Raw or ACR).

We’re only trying to evaluate these workflows and the quality of the two different RAW converters, so to keep things simple we’ll start with a single RAW file. The first/left image below is a low-dynamic range (LDR) JPEG exported from that RAW image in Lightroom with no corrections or adjustments. It’s generally overexposed, but there are substantial areas that appear entirely blown out. However, because the original is a RAW image, we can possibly recover some detail from those highlights that don’t appear in a 0EV LDR JPEG.


The second image was made by selecting Plug-in Extras…Export to Photomatix Pro… in Lightroom. This creates a single TIFF image which is then opened by Photomatix Pro. I used Photomatix Pro’s default settings and returned a 16-bit sRGB TIFF to Lightroom, which I then exported as the JPEG above. There is virtually no recovery of any burned-out highlights in the resulting image.

The third image is the result of opening the original RAW file directly in Photomatix Pro, using its default processing, saving the results as a 16-bit sRGB TIFF from which the above JPEG was made. You can see that some of the details in the blown-out areas have been recovered.

I then used the technique which I recommend in order to save/recover as much dynamic range as possible when working with Lightroom and Photomatix Pro to create the image below.

The steps to create the above image are a bit more complex that the other workflows. The first step was to export three different 16-bit ProPhoto TIFF files from Lightroom. All three were from the same original RAW file as was used for the first two images, but the Exposure slider in Lightroom’s Develop module was set to 0.00, -2.00 and -4.00 respectively. I then opened all three TIFFs in Photomatix Pro as a set of bracketed originals. As you can see, this process recovered far more detail in what at first appeared to be the blown-out areas. (Don’t worry about what appears to be a shift in color. This is a separate issue and is easily resolved.)

These tests support the general understanding of many experienced HDR photographers that the Lightroom/ACR RAW file processor is dramatically superior to the one built into Photomatix Pro and that Lightroom’s Export to Photomatix Pro should be avoided in all cases. To take advantage of this workflow in realistic situations (eg, when you have bracketed originals instead of just one) I recommend following Klaus Hermann’s Five TIFFs method.

Update: Based on a friend’s suggestion, I decided to compare Unified Color’s HDR Expose to Photomatix Pro. Below are two images from HDR Expose. The first was made using the application’s own RAW processor. The second was made from the same three bracketed TIFFs as used for the last Photomatix Pro test.

If you ignore the differences in saturation, which are fairly easily corrected, these two images are quite similar to one another and to the three-TIFF Photomatix Pro output. When you consider that the left image was made without the hassle of first exporting three different TIFF variations, it appears that HDR Expose would be a better choice for this test case. This is even more so when you further consider that the left image above requires less color hue and saturation correction.

[Please use my Google+ page for comments. There are a lot more photographers there!]

The Lightroom “Edit in…” Problem

This is the second in a series of articles abut passing images between Lightroom, Photoshop and various plugins. The other posts include:

[See Update at the end of the post. 4:20pm PST on 1/10/12.]

Yesterday I posted the first in this series of articles (Are You Wasting Dynamic Range?) about problems passing images between Lightroom and Photoshop, plugins, etc. Today I want to look at just one such situation, the use of the Edit in… menu option in Lightroom 3. An hour ago I saw the announcement of Lightroom 4 beta. I wonder if this is something Adobe would consider fixing for version 4.

The Challenge

We start with the image below of the Golden Gate Bridge at night. Not only is the image generally overexposed, the highlights are completely blown out. Can we rescue this image? It’s easy to darken it overall, but what about those highlights?

Luckily it was shot in RAW so there’s a lot of data in the highlights and (to a lesser extent) the shadows that we can’t see in this uncorrected version. Just to be clear, what you see below is not a RAW image. There’s no way to display a RAW image in a browser or on your screen. The dynamic range of the image is just too great. Instead, what you see here is a JPEG derived from the RAW file using the default Lightroom settings. [Note: You can click on any image to see a larger version.]

Uncorrected

Correcting in Lightroom’s Develop Module

Below is an example of what we can do in Lightroom (or pretty much any other RAW file processing application) to recover the highlights and reduce the overall exposure. (For the curious, the settings are Exposure=-2.55, Recovery=65.) Additional corrections could certainly be made, but this illustrates what we’re trying to show. We’ve recovered a lot of detail in the highlights in both the moon’s reflection on the water and the city lights in the distance.

Corrected in Lightroom

Passing the Image to Photoshop

Now suppose you use Lightroom to organize your images, but you want to make your corrections in Photoshop rather than in Lightroom’s Develop module. Select Edit in…Photoshop CS5 from the Photo menu or right/ctrl-click on the image in the grid. Photoshop starts up and shows you pretty much the same thing as the first image at the top of this post.

But if you now try to recover the highlights, the image below is pretty much the best you can get. (Exposure adjustment layer with Exposure=0.38, Gamma Correction=0.37.)

Edit in...Photoshop CS5 and Corrected There

This looks a little better than the original, but not as good as the image corrected in Lightroom. Why? It’s because of how Lightroom passed the image to Photoshop. Rather than passing the original RAW file with all it’s wide-ranging data, Lightroom created a TIFF file, which is inherently low-dynamic range) and passed that to Photoshop instead.

From the Lightroom…Preferences…External Editing menu you can select the format and colorspace of the intermediate images passed to Photoshop, but a 16-bit TIFF using the ProPhoto RGB colorspace is the best option available. You cannot pass a DNG or other RAW-file image with high dynamic range.

What to Do?

Does this really make a difference to you? It all depends on whether you need to recover highlight or shadow details in your images. If not, then go ahead and use the Edit in…Photoshop CS5 feature. But if you want to recover any such data, there are two choices. First, you can do your recovery using the Lightroom Develop module and then Edit in…Photoshop CS5, in which case your corrections will be baked into the intermediate image. Alternatively, you can open the original RAW file in Adobe Camera RAW (ACR) or in Adobe Bridge, which will start ACR for you. This will allow you to make the same corrections as you can in Lightroom’s Develop module since it uses the same RAW file processor engine as ACR.

And if you shoot in JPEG instead of RAW, you don’t have to worry about any of this. Those highlights are burned out and gone for good. There is nothing to recover from a JPEG, which is already an LDR image. You can go from high-dynamic range (HDR) to LDR, but there’s no poing in going the other direction. Once you’re in the LDR world, the extended data is forever lost.

Edit in…(something else)

What about all those other options under the Edit in… menu? If you have some plugins installed, you might see them listed there. Passing an LDR intermediate image to these plugins is the only option. Therefore, if you want to recover highlights or shadows, you must do that in the Lightroom Develop module before invoking the plugin. My suggestion is that you also perform certain other Develop-module tasks before invoking the plugins such as Lens Correction — the plugin may delete the lens’ EXIF data — and preliminary sharpening and noise reduction.

[If you have any comments or questions related to this post, please make them on my Google+ page. There are a lot more photographers reading g+ than reading my blog!]

Update!

I’ve discussed this issue and my idea that Edit in… might support DNG intermediates in LR4 with Eric Chan, one of Adobe’s ACR gurus on the Adobe Labs Forum. Eric made a good case for why this might not be an appropriate feature. You can read the discussion here.

But over on Google+, Marko Haatanen provided a solution. In LR you can Photo…Edit in…Open as SmartObject in Photoshop… It won’t appear as though you’ve successfully moved the RAW file into PhotoShop, but if you double-click on the SmartObject in the Layers panel Photoshop will open the image in ACR. And if you’ve previously made adjustments in Lightroom’s Develop module, you’ll see them there, slider-for-slider. (Remember LR’s Develop module is virtually the same as ACR.) Very cool.

If you select two or more images in LR and go for Photo…Edit in…Open as SmartObject in Photoshop…, you’ll get the same number of images in Photoshop. But if your goals are either HDR or you just want to mask-in selections from multiple selections, what you really want is a single image with a SmartObject layer for each original. Again on Google+, Tarun Bhushan showed me how to do this. “In PS, click on a Smart Object layer in one open document and use Duplicate Layer. In the dialog that comes up, choose the destination document as the one where you want the Smart Object to be as a layer. Now you will have the two Smart Objects as layers in one document that you can then manipulate independently.”

I’ll have more to say about this as I continue to explore some of the best options for HDR in particular.

Are You Wasting Dynamic Range?

[Update 1/15/12: Added tests for Unified Color’s HDR Expose 2]

This is the first in a series of articles abut passing images between Lightroom, Photoshop and various plugins. The other posts include:

The other night at the meeting of our local photo club’s HDR Special Interest Group, we began a discussion about the preservation of the full dynamic range of RAW images when you use plugins, exports and scripts in Lightroom and Photoshop. I made the statement that, for example, when you Export from Lightroom to Photomatix Pro, the default is to pass the source images as TIFF files, which inherently reduces the dynamic range and looses data. A few people challenged that assertion, so I’ve set out to research it in some detail. This post represents the first round of my test results.

Note that this discussion does not apply only to HDR. The principles apply equally to exporting any RAW images to Photoshop or any plugin. [Spoiler: I’m going to demonstrate why you should use Adobe’s Digital Negative (DNG) file format when exporting images to Photoshop or Photomatix Pro.]

Buzzword Backgrounder

Let’s make sure we understand the classes of image-file formats. Only the RAW file formats (.NEF, .DNG, .CR2, etc.) can preserve the full dynamic range of data captured from your camera’s sensor. Once you convert to any other format (.TIFF, .JPEG, etc.) you will lose dynamic range. It doesn’t matter what colorspace you use (sRGB, Adobe RGB, ProPhoto). It doesn’t matter whether you use 8- or 16-bit encoding. And it doesn’t matter whether you select compressed or uncompressed options. All file formats other than RAW (or true HDR, which is rarely used) are designed for viewing or printing and are therefore inherently low dynamic range (LDR) to match the LDR-only capabilities of our displays and printers. If you add bit depth (switching from 8-bit to 16-bit) you’re just increasing the number of colors that can be represented and therefore minimizing banding. You are not significantly increasing the dynamic range of what can be represented.

RAW, HDR and LDR

It’s also important to understand that we don’t have the tools (hardware or software) to view the full dynamic range of a RAW or HDR image. Even if you shoot in RAW format, the image you see on your camera’s display is an LDR derivative. If you open your RAW images in Lightroom or Adobe Camera RAW (ACR), you’re again looking at an LDR derivative. And when you merge images in Nik’s HDR Efex Pro, HDRSoft’s Photomatix Pro and Unified Color’s HDR Expose the output is an LDR image. (We often look at an image and say, “It’s an HDR” or “It looks like HDR.” In fact, these are LDR images created from one or more originals or HDR intermediates. The data are only truly HDR while you’re within the HDR apps.)

The RAW File Converters

There’s a class of applications called “RAW file converters” which includes Lightroom, ACR, Phase One’s Capture One Pro, Nikon’s Capture NX2, etc. These apps have one goal: to create an LDR image from a RAW file. In doing so, the dynamic rage of the image will necessarily be reduced and data will be lost. The adjustments (sliders, curves, etc.) within these apps allow you to decide which data are removed and which are preserved, but “preserve all” is not an option. You have to lose something in order to create an image that can be viewed or printed. (Note that Photoshop cannot directly process a RAW image. If you try, Photoshop will first launch ACR and require you to create an LDR image that is then passed into Photoshop.)

The images below help to explain this point. I started with a RAW file that’s just one of a bracketed set. This is the -4EV (ie, most underexposed) of the set of five. I loaded this RAW file into Lightroom and then created the two images shown below. [Click on any image in this post to see a higher-resolution version.]


Yes, both of the above JPEG (ie, LDR) images were created from the same RAW file original. The left one used the default settings in Lightroom’s Develop module. For the right, I used Exposure=+4.00, Fill=70, Recovery=100 and Brightness=0. I could have used Adobe Camera Raw (ACR) instead of Lightroom and achieved the same results because the RAW processing engine of both apps are identical. Note that in order to bring out the detail in the shadows, I had to compromise and let the highlights burn out.

Using LDR file formats it takes multiple images to represent the full dynamic range of even one RAW image. You can’t squeeze all this information into a single TIFF or JPEG even by just reducing the contrast. If you try, you’ll lose too much tonal distinction. That is, levels of brightness will clump together and you’ll end up with tonal banding.

As you can see, there’s a lot more information in the shadows of the original RAW image than you might think if you only saw the first image. The goal I want to explore is how to ensure that all of that information is available within Photoshop or the various plugins and HDR applications.

Some popular HDR tools such as HDRSoft’s Photomatix Pro also can accept and fully exploit RAW images, but if you pass those RAW images to these applications from Photoshop, Lightroom, etc., you may unknowingly be first converting your RAW files into an LDR format and throwing away substantial detail that you cannot ever recover. Lightroom’s export to Unified Color’s HDR Expose is unique in that the default is to pass the full RAW image to the plugin. Because NIK’s HDR Efex Pro apparently cannot process RAW files directly, this is exactly what will happen if you use that plugin.

Exporting from Lightroom

What happens instead if you export the RAW image from Lightroom to Photoshop using the default settings (16-bit Adobe RGB TIFF). This is what you’ll see. It looks pretty much like the default JPEG from Lightroom.

But suppose you then want to use Photoshop to recover that shadow detail? The image below shows what happens when you add an Exposure adjustment layer.

It’s clear that some detail in the dark areas can be recovered, but the image is very contrasty and saturated and the highlights are now even more blown out. Certainly a lot of information has been lost by using a 16-bit TIFF as an intermediate format.

Could the problem be with the choice of the colorspace in the intermediate TIFF image? The images below were created in the same manner as the above image except that I used the sRGB (left) and ProPhoto (right) colorspaces.


None of these images comes close to the JPEG I was able to create directly from Lightroom. Specifically, none of the images made using an intermediate TIFF and Photoshop were as good in recovering shadow details. (Check the area under the statues at the very center/bottom of the image.)

Using DNG as an Intermediate Format

If you want to export images from Lightroom to Photoshop, how can you avoid this loss of data? The simplest solution I know of is to use Adobe’s DNG format for intermediate files. The image below shows that result. When Photoshop opens the DNG, it first launches Adobe Camera RAW (ACR). This gives you the opportunity to extract the extended-range data before creating the LDR image used in Photoshop.

As you can see, this is quite similar to the JPEG created directly in Lightroom. Again, that’s because Lightroom’s Develop module is based on ACR. Like Lightroom, ACR is also a RAW-file converter, which means it generates an LDR image from a RAW file. It’s that LDR image that is passed to Photoshop when you Open a RAW file from ACR. And as with Lightroom, that means there’s the potential for losing even more data.

Exporting for HDR Processing

If DNG is the best intermediate format between Lightroom and Photoshop, what about getting images into our HDR tools such as Photomatix Pro and HDR Efex Pro?

Starting with the same single unmodified RAW file in Lightroom, I ran an Export to Photomatix Pro. Here’s the result using Photomatix Pro’s default settings and three different intermediate options: (1) 16-bit Adobe RGB TIFF (Lightroom’s default); (2) 16-bit ProPhoto RGB TIFF; and (3) DNG.


The DNG version is again quite superior to the TIFFs.

What about exports from Lightroom to HDR Efex Pro Pro? The images below were exported from Lightroom to HDR Efex Pro using: (1) 16-bit Adobe RGB TIFF; and (2) 16-bit ProPhoto RGB TIFF. I had to use some rather extreme settings in HDR Efex Pro to make the images look even this good: Exposure=+1.7EV, Contrast=+25%, Saturation=-45%, Blacks=+85%. As far as I can tell, there is no way to pass an image from Lightroom to HDR Efex Pro as a DNG or other type of RAW file.


And what about the newcomer, Unified Color’s HDR Expose 2? The default export to this plugin apparently passes the RAW file, and the RAW converter is quite good. The image below is the result of the default export from a single RAW image to HDR Expose 2.

Conclusions

I’m going to run a few more tests. In particular, I want to demonstrate how it is possible to use extended-EV TIFF files created from RAW files as intermediates. I first learned this technique from Klaus Herrmann in the section in his excellent online HDR Cookbook entitled Creating HDR Images the Right Way. (Look for the Five TIFFs method.) I also want to get some feedback from other photographers who have studied this. I expect I’ll have to make a few corrections to this post even as far as I’ve gotten so far.

It seems DNG is the best format for a simple export from Lightroom to Photoshop or Photomatix. Unfortunately, HDR Efex Pro doesn’t support this. For that application, you should use Klaus’ Five TIFF method, which is a lot more time consuming. If you’re using HDR Expose, you don’t have to worry — the default work well. More to come.

[See also the next post in this series: The “Edit in…” Problem in Lightroom.]

Autofocus Calibration

I only brought one lens to the #MarinPhotowalk on Sunday: a Nikkor 135mm f/2 AF DC, which I bought used a few weeks ago. I shot everything wide open at f/2. But when I uploaded the images, it seemed as though every one of them was a little soft. In fact, the in-focus point was just a bit farther than where I intended, usually someone’s closest eye.

So today I dragged out my MTP LensAlign and checked that lens on my D700, which I also bought used about a year ago. Sure enough the tests were back-focused about 1/2″ at f/2 and a distance of six feet. That may not sound like much, but with that configuration the depth-of-field is only +/-0.36″.

I assumed the problem was just for my 135mm f/2 lens, but no. It’s off the same amount for all my lenses. The good news is (a) it’s adjustable in my D700, and (b) instead of changing it for each lens, there’s a Default setting that applies to all lenses. The range of correction is +/-20. (I don’t know what the units represent.) It took -13 to get it right.

I mentioned this to Scott Loftesness, who wasn’t aware that you can also do this on a Canon 5DMkII. I know it’s also adjustable on my cropped-sensor Nikon D7000.

The Lens Align MkII is way overpriced at $79.95, but it does work quite well. I haven’t seen discount prices anywhere. I recommend borrowing one if you can. BorrowLenses.com rents the Pro version for only $11 for three days. The difference among the models is relatively insignificant.

I previously bought the Spyder LensCal which is a few dollars cheaper, but I sent it back to Amazon because the construction quality was so poor.

Health Update

It’s been eight weeks since my discharge from the hospital and time for an update. For the most part, I’ve been getting steadily better. No more tubes. The only medication is another four weeks of blood-clot slowing Warfarin to make sure I don’t develop any more deep-vein thrombosis (DVT) blood clots. I’m still getting frequent blood tests for that medication as well as a chest x-ray every week or two to check on the one remaining issue: a persistent pleural effusion in my right lung. But I’ve been a bit tired and sometimes somewhat short of breath, particularly when climbing the steep hill at the end of my regular walk.

Yesterday I was supposed to have another thoracentesis procedure to remove more of the liquid in my right pleural cavity. The doctor showed me the most-recent x-rays which clearly showed something about one-third the volume of my right lung was keeping it from fully inflating. He also showed me a before-surgery x-ray. Wow! The pleural effusion back then filled a huge percentage of the cavity. My team of doctors had hoped the remaining effusion would eventually dissipate, but so far it hasn’t done so.

Before the procedure the doctor used ultrasound to get a sense of the size and location of the effusion, but what he discovered was that there was very little liquid in there. The majority appeared to be a non-liquid organized mass which he said was likely to be the consistency of rubber cement. This is essentially what my thoracic surgery in October was supposed to remove (along with a chest drain for any liquid) so it seems what I have is what remains from before the operation. I guess it wasn’t possible to remove it all. (I had a small-incision thoracic surgery. The doctor showed me photos of the scars from the traditional method — a shocking cut from in front of the shoulder all the way down to the hip. What I had was bad enough!)

Since thoracentesis can only be used to remove liquid, the doctor decided not to perform the procedure and instead sent me to radiology for yet another chest x-ray.

At this point it looks like one-third of my right lung can’t fully inflate due to the pleural effusion. I’m going to continue getting chest x-rays every week or two to check. If it gets better on its own…great. If it gets worse, I’ll probably need more thoracic surgery will be required to remove it. Ugh. But it seems likely that I may have to just “live with it.” The surgery isn’t without risks and complications of its own, so the doctors aren’t anxious to cut me open again. I’m generally healthy and active now, so the condition isn’t really affecting my lifestyle. I may just have to get used to being a bit more tired and not able to climb Mt. Everest.

Chronology of a Lost Month

This is one of those too-much-information (TMI) posts. I spent most of October 2011 in the hospital due to a liver abscess and subsequent complications, but due to my condition and medications I remember very few details of what happened during that time. I’ve reconstructed the following chronology based on notes taken by, and discussions with my wife, son, sisters and doctors. I wrote this primarily for myself, so I’d have a better understanding of the events. Warning: I don’t expect it will be of much general interest. And it’s long!

October 1-2

The last week of September 2011 was filled with photography: two photowalks with Google+ friends in Santa Cruz and Half Moon Bay; a third in Golden Gate Park with a group from the Marin Photo Club; and a long afternoon/evening private shoot on Alcatraz with Joe McNally. I was also scheduled to co-lead one of the Worldwide Photowalks with Catherine Hall in San Francisco on Sunday, October 2.

But on Friday it all caught up with me. I was wiped out and felt like I had really done too much. As the day progressed, I felt worse and worse. I knew something was seriously wrong. I had only a slight fever, but the shivers and shakes were severe. I was producing very little urine, and what I did produce was extremely dark brown. Uh-oh, I thought: There’s a problem with my kidneys.

At 3am on Saturday October 1, I called the advice nurse at Kaiser Permanente, our HMO. She asked the appropriate questions and said she’d discuss my symptoms with an M.D. on duty. The advice nurse called back and told me to head to the lab for some blood tests as soon as they opened that morning. My wife had her own health issues (retinal bleeding) and couldn’t drive, so I drove myself to the lab, had the tests and drove home. Within two hours I got a call from the doctor who told me I should come in to see her ASAP and to plan on heading directly to the emergency room from there.

I drove myself to the ER, which probably wasn’t too smart. My wife rode with me, but I think it was a bit of a wild ride. In the ER I was quickly put on IV saline and given lots of tests: a chest x-ray showed some pneumonia; there were kidney problems and bowel problems. (The first doctor was concerned about a possible bowel obstruction.) Finally a CT scan showed a mass “the size of a large grapefruit” in my liver. They didn’t know what it was, but the possibilities included a malignant or benign tumor or an abscess. The only way to tell would be a biopsy, and since it was now Saturday night and the procedure couldn’t be done until Monday morning, I was admitted to the hospital and waited 36 hours. My fever was up to 103.4.

October 3

Monday morning they wheeled me down to a department I’d never heard of: Interventional Radiation, where a team of doctors and assistants perform surgical procedures with the aid of live x-rays, fluoroscopy, etc. It’s pretty wild. There’s a lot of hardware and computer-enhanced imaging and the team members are all wearing lead coverings. They inserted a large needle into my liver. I was quite sedated, but I do remember the point at which one of the doctors said, “We’re getting pus,” or something like that. I realized that was good news. It was an abscess, not a tumor. They drained some of the fluid and inserted a drain tube, which I kept for the next four weeks. They never did perform a biopsy of the liver itself.

It was getting harder and harder to find veins for IVs, so somewhere along the line — I think it was this day — a nurse inserted a peripherally inserted central catheter (PICC) line into my left arm. This is a catheter in the vein that runs up the arm, across the chest and into the vena cava. It’s not as creepy as it sounds. Now I had two ports that could be used for IV medications and even blood draws without having to poke a new vein each time.

I spent the rest of the day in a recovery room, but I was getting sicker and sicker by the hour, so they moved me to the intensive care unit (ICU). The pain in my abdomen was now excruciating when I breathed. I had developed a pleural effusion in my right lung. My breathing was faltering and my arterial blood gases weren’t good. I became acutely septic. In other words, I was one very sick puppy.

They started respiration therapy and told my wife if I couldn’t breathe more deeply they would have to put me on a ventilator. I was holding my breath to avoid the pain, but apparently no one understood that. I wasn’t able to communicate because I was just too out of it. Finally a nurse figured it out, got me started on continuous morphine — it apparently took quite a bit — and she and my wife  talked me into exhaling instead of holding my breath. Ventilator avoided.

The good news at this point was I didn’t have liver cancer. The bad news was I was going downhill fast from a bacterial infection in my bloodstream and messed up blood gases due to my poor breathing.

In the meantime, the labs identified the primary/original culprit: a bacterium known as Streptococcus milleri. This bacterium is one of those that we all have in our mouths, stomachs and intestines, but if it gets into our bloodstreams it’s extremely toxic. Normally the liver can deal with small amounts of milleri, but in my case there was way too much and the liver was overwhelmed. Rather than filter it, as the liver normally does, it created a separate space (the abscess) where it kept the infection segregated. Because of the size of the abscess, the infectious-disease specialists thought this process had been going on for four to six months. They started an IV antibiotic that was specifically targeted to Streptococcus milleri.

October 4

Tuesday the doctors were worried I was developing Acute Respiration Distress Syndrome (ARDS), which along with the acute sepsis was a potentially fatal condition. I had pneumonia, but they weren’t too worried about that since the antibiotics should be taking care of it. I also had serious edema. I had gained 25 pounds of fluids since this whole thing started.

October 5

The next morning my team decided to perform a thoracentesis. Using local anesthetic, they inserted a needle below my right shoulder blade into the pleural cavity around my lung to remove some of the fluid that had accumulated there. They removed 200-250cc of fluid, but another x-ray revealed 600-700cc — two-thirds of a litre! — remained. At this point I was getting a chest x-ray at least once every day, which continued until my last day in the hospital. The fluid they removed was more similar to the fluid from the liver than the doctors liked. They told me it was not uncommon for the infection and fluid from a live abscess to reach the lung, sometimes via a “tunnel”. The liver is just under the right side of the diaphragm, which is why it had become so painful to breathe. The doctors increased my pain medication again.

October 6

By Thursday the size of the liver abscess was dramatically smaller. My fever subsided and my blood gases and blood pressure, which had been very low, returned to normal. In the afternoon, after three days in the ICU, I was transferred to a regular floor. But the doctors continued to drain more fluid from my pleural cavity. The subject of thoracic surgery was raised, but only if the abscess “shelled” out from the liver or the fluid in my lungs developed into too many separate “pockets” such that it couldn’t be easily drained.

Unfortunately, I developed swelling in my left arm and an ultrasound revealed I had developed a blood clot — an acute deep vein thrombosis (DVT) — from the PICC line. I was immediately started on Heparin to thin my blood and reduce further clotting.

October 7-9

Over the next three days my condition improved steadily. I still had a lot of tubes including an IV (saline, two antibiotics, pain meds, diuretic), an arterial catheter (to track blood gasses), the liver drain and the IV PICC line, but with the help of the physical therapists I was finally able to get out of bed (to use the bathroom instead of a bedpan!) and to walk. At first it was just a few steps but by Sunday I was able to climb twenty steps, a requirement for going home.

But the hospital is a quiet place on weekends. A number of departments have minimal staff on Saturday and Sunday and in general it seems procedures and decisions tend to be delayed until the start of the week when the full team returns.

October 10

On Monday things got busy once again. It started with another CT scan, which unfortunately showed more fluid was accumulating in the pleural effusion, which had also become loculated — split into a number of those separate pockets. This meant they couldn’t be reasonably reached with further thoracentesis, so the only solution was thoracic surgery, and for that I’d have to be transported to the larger hospital in San Francisco. Furthermore, the original liver abscess wasn’t resolving as quickly as the doctors had hoped. It hadn’t changed in size since the previous CT scan. To make matters worse, I now had several small blood clots, which could be new or could have broken off from the original one. These would need to be watched.

The medical-transport crew arrived like a SWAT team of paramedics. With a drill-sargent nurse as their crew chief, they whisked me off by ambulance to San Francisco. Once there, the PICC line in my left arm was removed and replaced with a new one in my right arm.

October 11

Tuesday was thoracic surgery day. I learned they would make multiple relatively small incisions and use a camera and tools to remove the material of the pleural effusion. There was a 20% chance it might be worse and they’d have to perform a more complex procedure with a lot more cutting. (That didn’t happen, thank goodness!) Post-op there was some chance of scarring of the lungs and that I could lose 10-20% of my lung capacity.

I woke up after the surgery in the cardiovascular (CV) ICU in a lot of pain and with some new tubes: a catheter in my bladder and drain tubes in my chest. I still had the liver drain as well. To make matters worse, there was a mixup on my pain medication and I was without it for many hours. Of the times I can remember, this was the worst for me. Finally they gave me IV Dilaudid (synthetic morphine) and things calmed down.

October 12

Recovering from the surgery, was tough. Again, this may be because I was also becoming more coherent and aware than I had been for the first eleven days of this ordeal. I was still in the CV ICU. My edema had become quite serious, but the diuretic (Lasix) was finally kicking in. My blood pressure reached 215/145, and it could only be measured on my legs because I had a clot in one arm and the PICC line in the other.

October 13

Thursday was more of the same, but I was stable so they moved me out of the CV ICU to a CV post-surgery floor. This is also pretty much the first day I can remember. Except for the day just prior to surgery, the first twelve days are still pretty much a blur to me at best. I think it’s a combination of medication and the body’s reaction to the infection, procedures, etc.

Along with full consciousness came real discomfort. I still had serious edema. My feet looked like bloated potatoes. My body temperature swung back and forth between cold chills and hot sweats, which was a bigger problem than it might sound. The pain was weird. It was never acute. In fact, it took me a while to realize it was actually pain because it was so non-specific. All I knew was that I was extremely uncomfortable and the only solution was narcotics. After surgery I was given an intravenous Patient Controlled Analgesia (PCA) device. You get a button you can press to get an immediate small dose of Dilaudid, then it’s locked out for some period of time like 10 or 20 minutes. I also had oral narcotics (Norco/Vicodin and Percocet) but these took 45 minutes or more to work. (Actually, the Percocet just made me stupid. It didn’t seem to do anything for the pain.) The PCA was great when the pain broke through the other drugs and I couldn’t wait until the next oral dose took effect. Unfortunately, I worked hard to use it as little as possible, so they took it away! That will teach me. I guess if I’d pressed the button a few times an hour they might have thought I needed it longer.

My other error had to do with food. The regular menu was decent, but they had to test my blood sugar before every meal and possibly give me a somewhat painful insulin injection depending on the results. I’m not diabetic, but I guess the blood sugar/insulin relationship frequently gets weird after surgery like mine. So I made a deal with one of my doctors. I said I’d be willing to eat the diabetic menu if I could stop getting the tests and injections. Big mistake! Whatever you’ve heard about hospital food, there’s nothing as bad as the food they serve to diabetics. I don’t really how to describe it other than to say it has no flavor whatsoever. And of course there’s nothing interesting on the plate to begin with.

October 14

The main event Friday was a transesophageal echocardiogram. From the time of the original diagnosis, the infections-disease doctors were concerned about my heart. Streptococcus milleri often causes endocarditis, an infection of the heart valves. The test sequence for this is rather strange. First they perform a non-invasive (ie, from outside the chest) ultrasound transthoracic echocardiogram. If the results are negative — ie, they don’t detect any endocarditis, as was my case — then they perform the more invasive transesophageal echocardiogram. This is one of those procedures where you have to swallow an ultrasound transducer to get it into your esophagus, which positions it close to the heart valves so the radiologists can get a very clear picture. As with some of these other procedures, it wasn’t as bad as it sounds. My results were thankfully negative for so-called vegetation on the valves.

But I was still quite uncomfortable. I wasn’t allowed to get out of bed on my own until I had the approval of the physical therapist. I had six different IV drip bags feeding the two ports in my PICC line: saline, two antibiotics, blood-pressure medication, pain medication and the diuretic. But for the first time since the earliest days in the emergency room, they removed the supplemental oxygen I’d been breathing. And with the help of the pain medication, I finally got a good night’s sleep.

October 15-16

Finally, on Saturday, the doctors began talking about my going home. Each department had their own requirements for my discharge. The surgeons wanted my chest drainage to stop. They discontinued the active (vacuum) suction and let gravity take over. Other MDs were still concerned about the known DVT (blood clot) in my left arm and possibly one in the right arm, so I was wheeled down to radiology for another set of ultrasounds. The left arm clot was smaller and there was no sign of one in the right. Regardless, they told me I’d be on steady Heparin until my release form the hospital, then three months of Warfarin (coumadin) at home. I was also still receiving intravenous antibiotics (Ceftriaxone) for the original liver infection, which would also be continued after my discharge. As before the lung surgery, physical therapy wanted to make sure I could get in and out of bed on my own and walk up and down stairs. The bed was still a challenge, but I was able to walk about 1,000 feet and climb 24 steps. My edema was still a problem, so the IV Lasix continued.

I was feeling better and getting stronger every day, but still had a lot of pain from the surgery. The pain had shifted from the incisions to my ribs. The surgeon explained that they had to spread the ribs, tweak some muscles and stretch the cartilage to do what they needed to do, hence the pain I was feeling.

Like I said before, not much happens on weekends, so Sunday was just another day of waiting, trying to control the chills, sweats and pain, and wishing I hadn’t opted for that diabetic menu. On occasion I was able to talk a technician or food server into giving me something I wasn’t supposed to have. I was desperate for anything with flavor.

October 17

Monday morning the first string returned to work and I was able to get the procedures and tests I needed to wrap things up. The most significant was another visit to the Interventional Radiation department to check and reposition the drain in my liver, since that one was going to stay in even after I went home.

October 18

After 17 nights in two hospitals, I was finally discharged. At the very last minute, a physician’s assistant from the surgery department came and removed my chest tubes. Just like he said, it hurt slightly for about three seconds and then it was done.

Because of the long wait through the weekend, I was fairly strong and stable on my feet. Physical therapy had given me a cane, but I no longer needed it. I could walk up and down a full flight of stairs, and while it was a bit awkward and painful, I could get into and out of bed on my own.

I went home with a fair amount of paraphernalia and medications including:

  1. the PICC line in my right arm so I could self-administer intravenous drugs and get blood tests without another needle in my vein each time;
  2. a “JP” drain in my liver with an external suction pouch, which I safety-pinned to my clothing;
  3. lots of bandages over about eight incisions and other wounds from various procedures;
  4. intravenous Ceftriaxone (Rocephin), an antibiotic to kill off any remaining Streptococcus milleri;
  5. Metronidazole (Flagyl), another antibiotic to fight an amoebic infection they thought I could have. I was still taking it because a few weeks were required to get the results of the lab tests I had early on;
  6. Warfain (coumadin) for the potential and known blood clots; and
  7. Lisinopril for my blood pressure which had become higher than normal during my hospitalization.

Recovery

Once home, my recovery progressed quite rapidly. My wife, a retired R.N., changed my dressings. Kaiser has an amazing Home Infusion service, which delivered and monitored my IV antibiotics. I went frequently to the local outpatient infusion center for blood tests and PICC-line dressing changes. After about three weeks, I ended the antibiotics and the PICC was line removed.

On November 1 I returned to the Interventional Radiation department in San Francisco. It was supposed to be another “drain check” procedure, but they removed the liver drain altogether without me even knowing it. Never felt a thing.

Because of the DVTs (blood clots) I’m still taking Warfarin daily and getting blood tests once or twice a week to monitor the clotting times. This should end in early January 2012.

I’ve also been getting chest x-rays nearly once a week. I still have a pleural effusion: something (liquid or some kind of gunk) between my right lung and the pleural lining. This reduces my lung capacity by 10%-20%. My doctor says it will eventually dissipate, but it sure is taking a long time. I do notice that I have non-infectious pneumonia-like symptoms. There’s occasional slight pain, and I sometimes get a little short of breath and get tired a bit more easily than I’d like. But I don’t generally notice theses symptoms. Compared to how I felt six weeks ago, I’ll take what I’ve got.

How Did This Happen?

Okay, so how did all this happen? What was the cause of the Streptococcus milleri liver infection in the first place?

As I mentioned, this is a bacterium that we all have in our mouths, stomachs and intestines, but it’s toxic in the bloodstream. My team of infectious-disease doctors were hardcore medical detectives. They were extremely inquisitive about my travel, activities, diet and dental history. One doctor in particular kept asking me about recent dental work. Yes, I’d had a cleaning by a dental hygienist, and I got a new crown during the summer, but that didn’t seem to be it. I had to think back. What happened in the April-May timeframe of when this might have started.

And then it occurred to me. Back in the spring, my hygienist convinced my to start using a Waterpik in addition to flossing, and I did so every day. But there was one area of my gums that always bled. If I’d read the instructions for the Waterpik, I’d probably have found they said something like, “If your gums bleed, stop.” But I just figured I needed to toughen up those flabby gums, so I kept using the Waterpik on them night after night. Every night they bled. And every night that opened a pathway for more Streptococcus milleri to enter my bloodstream.

We’ll never know for sure. The evidence doesn’t give us a provable cause-and-effect relationship, but the circumstantial evidence is so strong, that I and my doctors are satisfied that my constant traumatizing of my gums was the ultimate cause of my live abscess. Not surprisingly, my Waterpik was swiftly and unceremoniously disposed of once I got home.
Cessna’s Vision Problems

My wife, Cessna, has been having some vision problems, and since so many friends and family members have asked for details through email and all the social networks we’re on, I thought it might be easiest to publish the info here and just link to it. This is my version, not hers, so I hope you and she will forgive my inaccuracies.

For a number of years Cessna thought she had more floaters in her eye than normal. Three years ago her optometrist noticed some minor irregularities on her retinas, but no one thought it was anything serious. Cessna teaches Aikido so she rolls and falls a lot, and at one point she noticed a few flashes in her eyes and other irregularities. She had some tests by our HMO’s opthalmology department, which merely confirmed that yes, there was something on her retinas, but no big deal.

Then in June of this year she started having more serious things in her left eye: blobs of stuff, larger than the usual floaters, that more severely obscured her vision. She returned to opthalmology who diagnosed her with retinal vasculitis, inflammation of the blood vessels in the eye. They suspected the inflammation was causing a reduction of oxygen in the blood and the eye to therefore generate additional (undesirable) blood vesels as well. The blood vessels (veins, arteries or both) were leaking some blood into her eye, and that’s what was obscuring her vision.

The doctors started running all sorts of tests: x-rays, MRIs, blood tests, etc. They also performed eye angiograms using injected fluorescein dye, which enhances the image of the blood vessels and apparently can actually show the blood leaking. They confirmed their diagnosis, but Cessna had a pretty nasty allergic reaction to the fluorescein. She had a second angiogram and the reaction was so severe, even with a dose of Benadryl, the assistant was ready to administer an EpiPen.

Although the doctors were moderately confident in the diagnosis of her condition, they still didn’t know what was causing the inflammation so they didn’t know how to treat it. They told Cessna that if it didn’t go away (and it didn’t appear to be) she might need to start using immune-suppressant drugs like Humira to reduce the inflammation. These are nasty drugs for anyone, but Cessna doesn’t have a particularly strong immune system to begin with. The doctors also said they might want to inject Avastin directly into her eyes to halt the growth of new blood vessels. (Yeah, my thought, too.)

The optometrist suggested Cessna get the advice of a nutritionist, which she did. If there was anything that might avoid the immune-suppressant drugs it was worth a try, so Cessna had another slew of blood tests looking for food sensitivities. The result was that she started an incredibly strict diet in mid July. We’re not just talking gluten-free; we’re talking everything-free. It’s a diet based upon her specific sensitivities.

That’s the course she was following until a week ago, when her right eye (which was the good one) suddenly became completely occluded. She couldn’t see anything through the floating mass. We went to the opthalmic experts the same day and they told her it was blood — a lot of it. But the recommended treatment was the same: maybe the Humira, but just wait and see. Well, that’s a bad joke since she now couldn’t see well enough to drive or do many other things. And there wasn’t any indication it was getting better. In fact, it was getting worse.

We decided to go outside of our HMO and get second opinions from other local opthalmic gurus, and that’s what we’ve been doing for the past three days. Here’s what we’ve been told so far:

  • The diagnose is still retinal vasculitis.
  • They don’t know the cause, but there are still a few more tests that will be done.
  • If they can’t find a treatable cause, they may want to give her prednisone. But that’s a steroid with all sorts of bad side effects — Cessna had an aunt who died from taking it long term — so it can’t be used for more than a few months.
  • If that doesn’t work, then they’re talking about Humira, etc.
  • They used ultrasound today to determine that she doesn’t have any retinal detachment. (I got to see this in real time. It was an amazingly clear picture, taken through the eyelid and all.)
  • The blood in the right eye might dissipate by itself, but it’s going to take “months”. If it doesn’t, they’ll have to remove the blood surgically.
  • The doctors really want to see what’s going on in the right eye, but they can’t because the blood is in the way. Once it’s gone (on its own or via surgery) they want to do another fluorescein angiogram, but due to Cessna’s reaction she’ll need prednisone and Benadryl beforehand.
  • Once her eyes clear, the doctors also want to go in there with lasers and zap the extra blood vessels. Apparently she’s already permanently lost vision in those spots anyway, but it doesn’t sound like they’re too critical.

At this point Cessna’s hanging in there. It looks like she’s got another week of tests and doctor visits, and the extreme diet continues. The best news came today from the first doctor to tell her that he didn’t expect any of this to be permanent. He wasn’t sure, of course, but he told her she should expect to recover her vision.

Thanks to everyone for your good wishes. I’ll pass them on to Cessna.

Labs and Papers for Black & White

This post is a review of black-and-white printing on eight different papers from four U.S. photo labs.

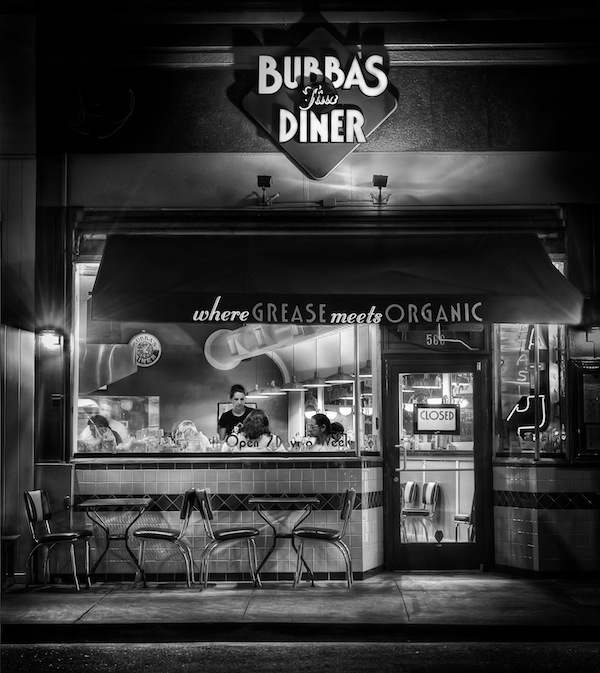
I’ve been uploading my recent photos to Google Plus, where I’ve been getting good feedback and meeting great photographers. When I published this b&w image of Bubba’s Diner in San Anselmo, California, the comments were particularly enthusiastic. And then, totally out of the blue, two people said they wanted to buy prints. How cool is that? I didn’t get (back) into photography to sell my images, but why not? If someone can get pleasure from hanging one of my photos on their wall, that would be pretty cool.

Bubba's Diner, San Anselmo, California

How to sell prints to my first two customers? I quickly cleaned up my SmugMug portfolio at DougKaye.com — it still needs a lot of work — and upgraded to a Pro account so I could order the prints through there and even sell them directly. But before I accepted money for my work, I wanted to know what the prints would look like, so I decided to order prints of most of my portfolio images for myself. SmugMug uses two labs, and I opted for BayPhoto, which appears to be their more high-end lab. (The other, ezprints, is somewhat less expensive.) I first ordered a print on Kodak Endura paper, which SmugMug/Bay Photo refer to as their Lustre stock. When the print arrived, I was rather disappointed in the color and texture of the paper. So I turned to other photographers on Google+ and asked them what labs and papers they used for b&w. I got a few recommendations and then ordered prints from four labs (including BayPhoto) on eight different papers. Here’s a summary of my opinions, listed by the coolness/warmth of the papers, starting with the coolest. It’s not an exhaustive test, as I’m sure there are far more papers and labs out there. But if you’re thinking about black-and-white printing, this may be a helpful starting place.

Bay Photo’s Lustre is Kodak’s Supra Endura VC, a resin-based photographic paper finished with a “fine grain pebble texture,” which is too much artificial texture for me. SmugMug recommends it as a compromise between full matte and glossy and as a way to minimize fingerprints. I expect my prints to be matted and mounted behind glass, so fingerprints aren’t really an issue. This is the coolest of all six papers. It actually has a noticeable blue cast to it. I’d say it’s my least favorite of the batch. ($3.23 via SmugMug for an 8×10 color-corrected print. Direct from BayPhoto: $3.50, or $1.79 without color correction.)

Bay Photo’s Metallic (Kodak Endura Metallic VC) is actually a touch warmer than the Endura, which shows how cool/blue the regular Endura really is. The metallic is obviously very glossy and has a bit of a greenish cast to it. The whites and highlights are very reflective/silvery, hence the metallic moniker. I don’t think I’d be likely to use this paper. ($4.12 via SmugMug for an 8×10 color-corrected print. Direct from BayPhoto: $4.03, or $2.06 without color correction.)

Bay Photo’s Glossy (also a Kodak Supra Endura VC) is the third coolest paper, and still not particularly warm. The blacks are deep and there’s pretty good detail in the shadows. I’d probably use this for images where I wanted to emphasize the drama of a contrasty, particularly crisp picture. ($3.23 via SmugMug for an 8×10 color-corrected print. Direct from BayPhoto: $3.50, or $1.79 without color correction.)

MPIX offers a paper they call True B&W, Ilford’s True B&W. This is a silver photographic process, so there are no color dyes or inks at all. It’s yet another cool paper, almost as cool as the Bay Photo papers. Like the Endura Metallic, it has a slight greenish cast. Of all the printer/papers combinations, it’s the lowest contrast. There are no deep blacks and it has the least detail in the shadows. The opposite of Bay Photo’s Glossy paper, I might use MPIX’s True B&W when I particularly wanted a softer, gentler low-contrast look. ($2.49 for an 8×10 print)

I wasn’t really thrilled with any of these combinations, so I asked Matt Russell, a friend who shoots and sells a lot of b&w landscapes, about the high-end labs he uses. He suggested I look into West Coast Imaging and Digital Silver Imaging. WCI has a $250 minimum order, but they were willing to work with me on these tests. Obviously, you don’t want to order one or two 8×10’s at a time from WCI.

DSI uses Ilfospeed Resin-Coated paper with an Ilford Pearl (lustre) surface for their Custom RC prints. This is another lower-contrast combination, but not as low contrast as the MPIX True B&W. The blacks are also deeper and richer than the MPIX, but still not as deep as others. Furthermore the blacks are rather warm. It’s a very nice combination: a neutral paper with slightly warm blacks. One of the best. ($18 for the first 8×10; $9 for prints 2-10.) DSI also offers a less-expensive Direct to Print option (ie, not their Custom service) that delivers Ilford RC Pearl prints for much less ($4.59 for 1-9 8×10 prints; $4.19 for 10 or more).

DSI’s Custom Fiber Base prints are on Ilfobrom Galerie Fiber paper. This is fairly warm paper, but the blacks are actually cooler, similar to the MPIX True B&W. It’s a heavy double-weight semi-gloss fiber paper, about the same weight as the Ilford Gold. It’s in the lower-contrast category like the MPIX True B&W and the DSI Custom RC, but not as low-contrast as the others. The paper is quite warm, but the blacks are cool (again like the True B&W). The depth and richness of the blacks are excellent as are the shadow details. ($38 for the first 8×10; $25 for prints 2-10)

WCI offers Ilford Gold (Ilford Galerie Gold Fibre Silk), warmer still than DSI’s Custom Fiber Base. It’s a very heavy paper made with real rag and has a marvelous rich look to it without sacrificing good, deep blacks. ($12.22 for the first 8×10 of a single image; $10 for prints 2-9; $8.33 for 11-.)

WCI also offers Silver Rag (Crane’s Museo Silver Rag), a 100% cotton paper. It has slightly more rag texture than even the Ilford Gold. This is the warmest of all the papers I tested, with a slightly yellow cast. I would use this paper if I wanted a particularly warm look. Otherwise, I’d stick with the Ilford Gold. (Same price as WCI’s Ilford Gold.)

With the exception of the Ilford True B&W paper used by MPIX, all of the above have deep, rich blacks. It’s possible that a different print on the True B&W might not have such a low-contrast look. But while all the others have solid blacks, all but the two WCI combinations do so by increasing contrast and therefore losing some detail in the shadows.

There’s no question that the more costly prints from DSI and WSI are superior to the others. DSI’s Custom Fiber Base prints are downright expensive.

I’m sure your experiences vary and you probably have used labs and papers not listed here. Leave your reactions in the comments for all to see. DSI’s pricey Custom Fiber Base prints are perhaps the best of all for most of my work, but damn expensive. It’s the one option that starts to become more than a substantial part of the total (including matting and framing) costs. A 12×18 costs $88 plus tax and shipping. For most high-quality work, I’d probably chose Ilford Gold from WSI if I had enough work to justify their $250 minimum order. Otherwise, I’d probably go with DSI’s Direct to Print Ilford RC. For by far the fastest service and the lowest cost (and so long as I wanted a very crisp look), I’d use Bay Photo’s Endura Glossy. WCI’s Silver Rag is an option I’d reserve for those times when I needed very warm (almost toned) whites.